Learn these 3 rubbermaille pattern variations and then create your own designs!
I’m enjoying using rubber rings in my chainmaille patterns, such as the Biomechanical Bracelet. If you’ve made the Biomechanical design and want to take your rubbermaille even further, here are some project variations for you to try! By using different color combinations, the design possibilities are virtually limitless!
You’ll need the instructions for Biomechanical, as each of these projects builds on components learned in the jewelry tutorial. If you’ve purchased a kit, you’ll have most of what you need to make the earrings, as all our kits come with plenty of extra rings. Otherwise, just grab some additional rubber O-rings and anodized aluminum rings, and you’re set!
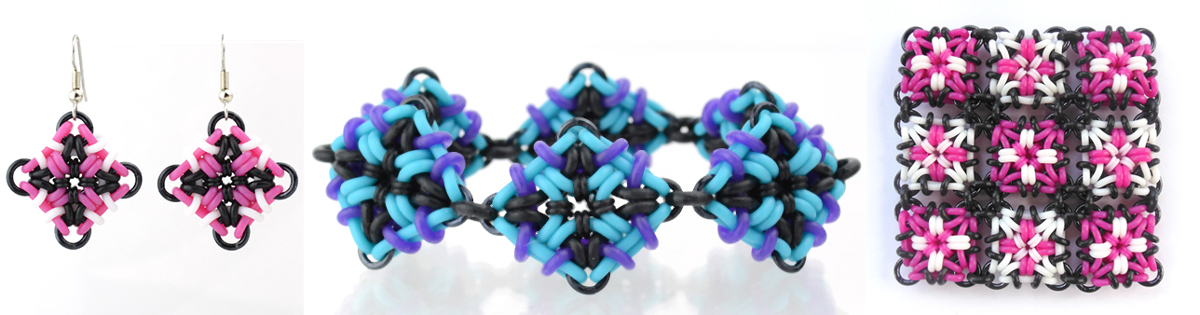
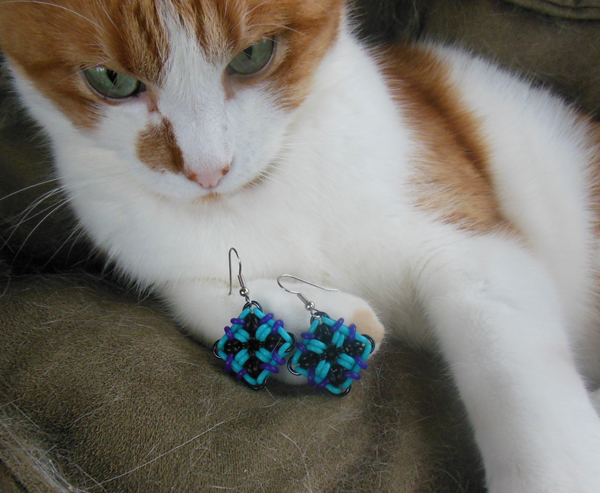
Chainmaille Pattern 1 – Biomechanical Square Earrings / Single-Unit-Components
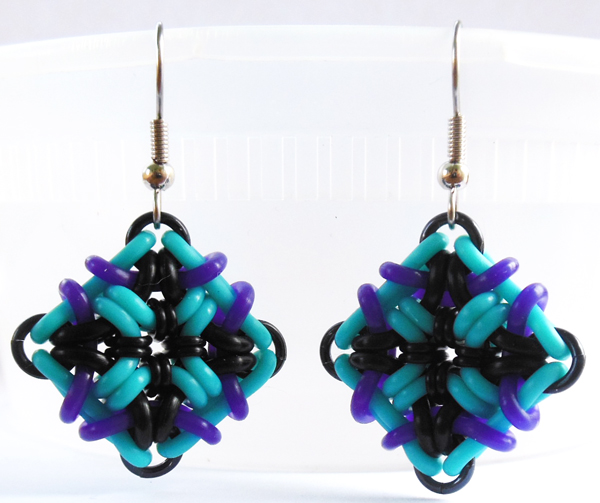
These Biomechanical “squares” are perfect on their own as earrings. Or make multiple squares and connect them as shown in patterns 2 and 3 below.
Materials for Single Units:
NOTE: Double the quantities to make a pair of earrings!
8 qty – C19 RUBR – 19 SWG 7/64″ (1.0 mm)
16 qty* – P16 RUBR – 16 SWG 5/16″ (7.1 mm)
1 qty – H16 AA – 16 SWG (1.6 mm) 3/16″ (4.8 mm)
4 qty F18 AA – 18 SWG (1.2 mm) 5/32″
* To make the earrings shown in the step-by-step photos, I used rubber rings in the following quantities:
8 aqua + 4 black + 4 purple
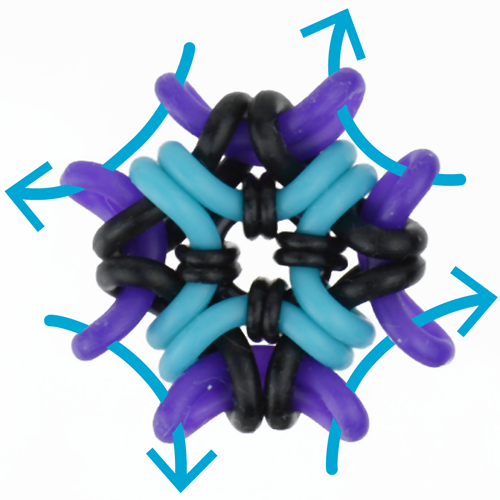 |
1 – Follow the Biomechanical Tutorial up to step 9 and then pull a 4th layer of rubber rings through the corners as shown. Use the tip shown after steps 5 and 8 to keep the previous rubber rings from sliding out of place. | |
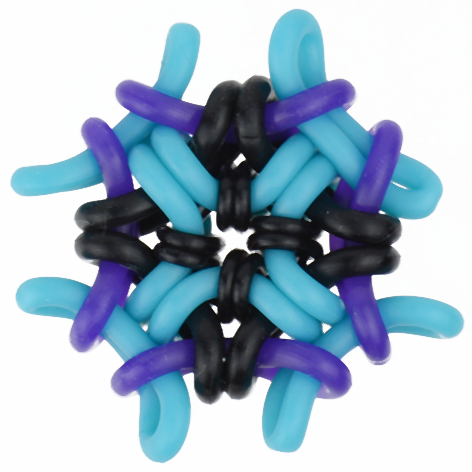 |
2. Your piece should now look like this. | |
 |
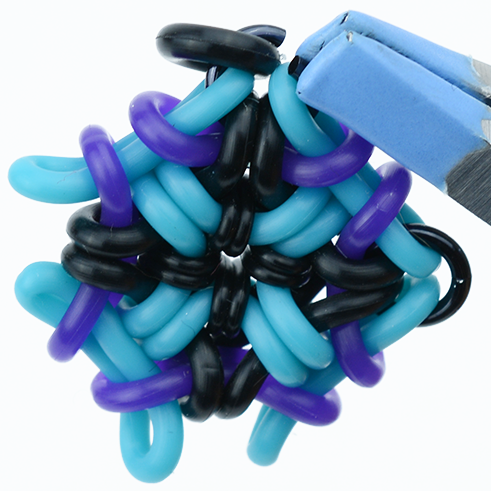
3. Weave a small metal ring* through the corner of 2 adjacent rubber rings that you just added (aqua) plus the corners of the 2 rubber rings (black) inside. This means your metal ring goes through 4 rubber rings total. * Size F18 shown. (You could also size L16. See examples following step 5 below) |
|
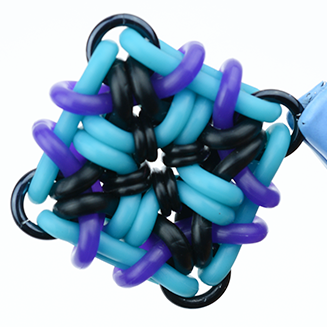 |
4. Repeat this for all corners. If making earrings, be sure to add the earwire onto one of the corner rings before you close it. | |
 |
5. Repeat steps 1-4 to create your second earring. |
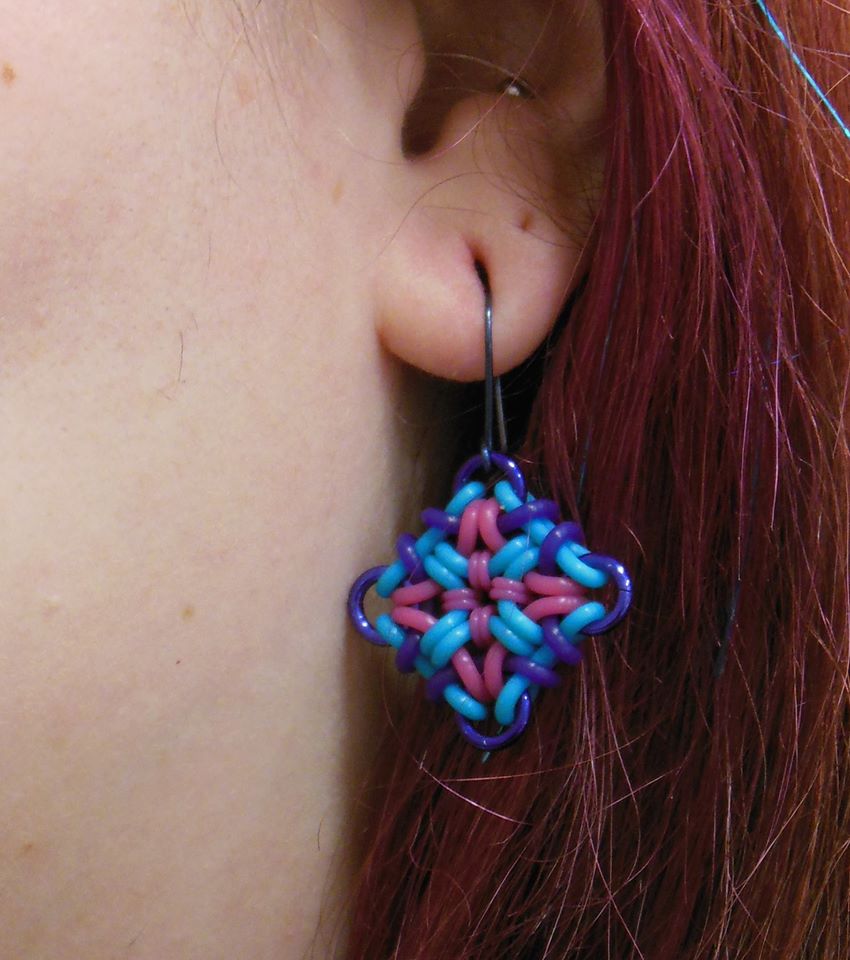 Earrings with L16 corners
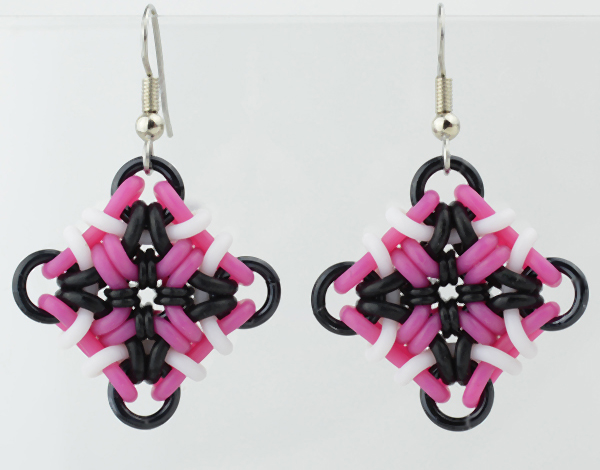
You don’t have to use size F18 for the corners. The weave is fairly flexible with regard to corner sizing, and you can increase both the inner diameter and the wire diameter. If you do this, the weave may not look exactly like a “square” and more focus will be drawn to the corners. Neither look is better; it’s just a matter of personal preference!
Both the earrings shown here use size L16 for the corners.
L16 – 16 SWG (1.6 mm) 1/4″ (6.4 mm)
Conveniently, the Biomechanical kits come with plenty of L16 rings, so you might be able to create an extra pair of earrings (or more!) with your bracelet kit. Simply purchase base metal earwire or colorful niobium earwire and you’re good to go!
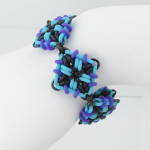 Chainmaille Pattern 2 – Biomechanical Diamond Bracelet
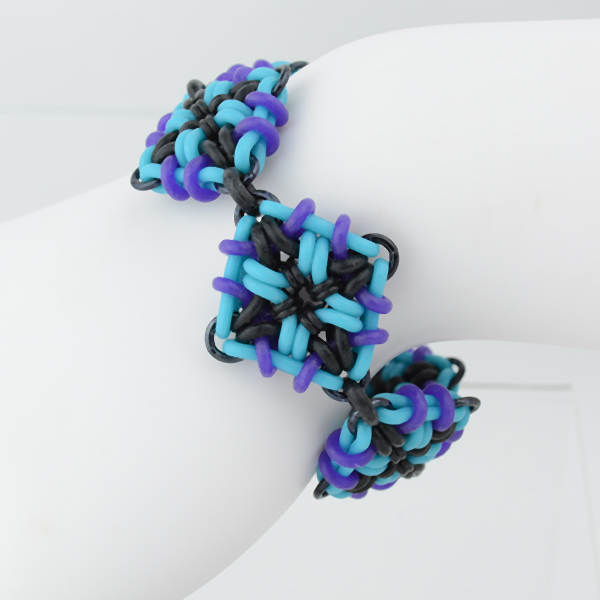
Connect individual squares by their corners with metal or rubber rings to create the Biomechanical Diamond Bracelet.
 |
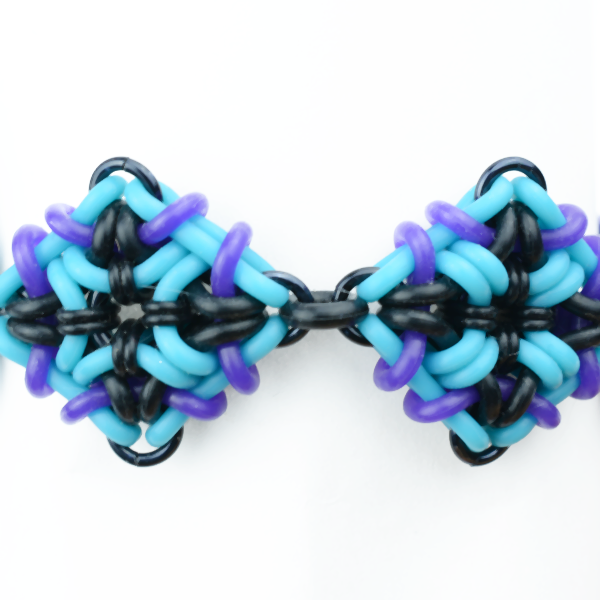
Follow steps 1-4 above to create 7 or more units—each unit is just shy of a inch at about 7/8″ (2.2 cm). Use size F18 rings in the corners. Then use additional F18 rings to connect units together as shown. Add a clasp to the end units. | |
| Or, if you want a fully stretchy bracelet with no clasp: | ||
 |
1. For your first unit, follow steps 1-4 above, except for two corners (in steps 3-4), add a D14 rubber ring onto one F18 jump ring before closing. Make sure the corners with the D14s are opposite from one another, and not adjacent corners, so that you can connect units as shown in the large photo above. D14 – 14 SWG (2.0 mm) 1/8″ (3.2 mm) |
|
 |
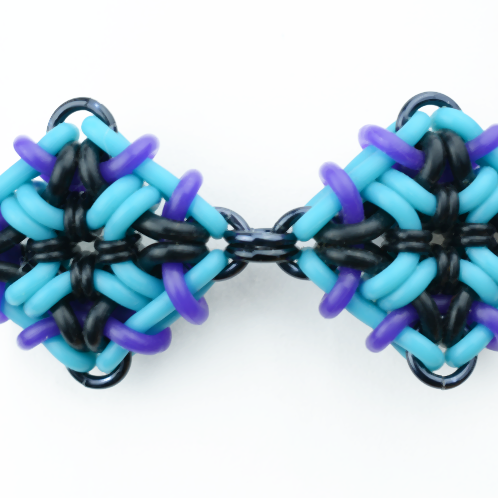
2. When you begin step 3 on your next unit, after weaving your F18 through the 4 rings, also weave it through a D14 ring from the previous unit, thereby joining these 2 units together. On the opposite corner, be sure to add a new D14 ring before closing your F18, so that you have a “lead in” to your third unit. | |
Chainmaille Pattern 3 – Coaster! (Sheet form)
Create a sheet version by lining up your squares side by side, instead of by the corners. You can add additional rows, too, to make a wide cuff.
Shown here is a coaster. Because … why not? 😛 You could also use this design as a hotpad because the rings are made of silicone and are very heat resistant. All the aluminum rings are sandwiched in the weave, so they will not touch your table surface.
The coaster uses size L16 rings for the corners, and D14 rubber rings to connect the units together.
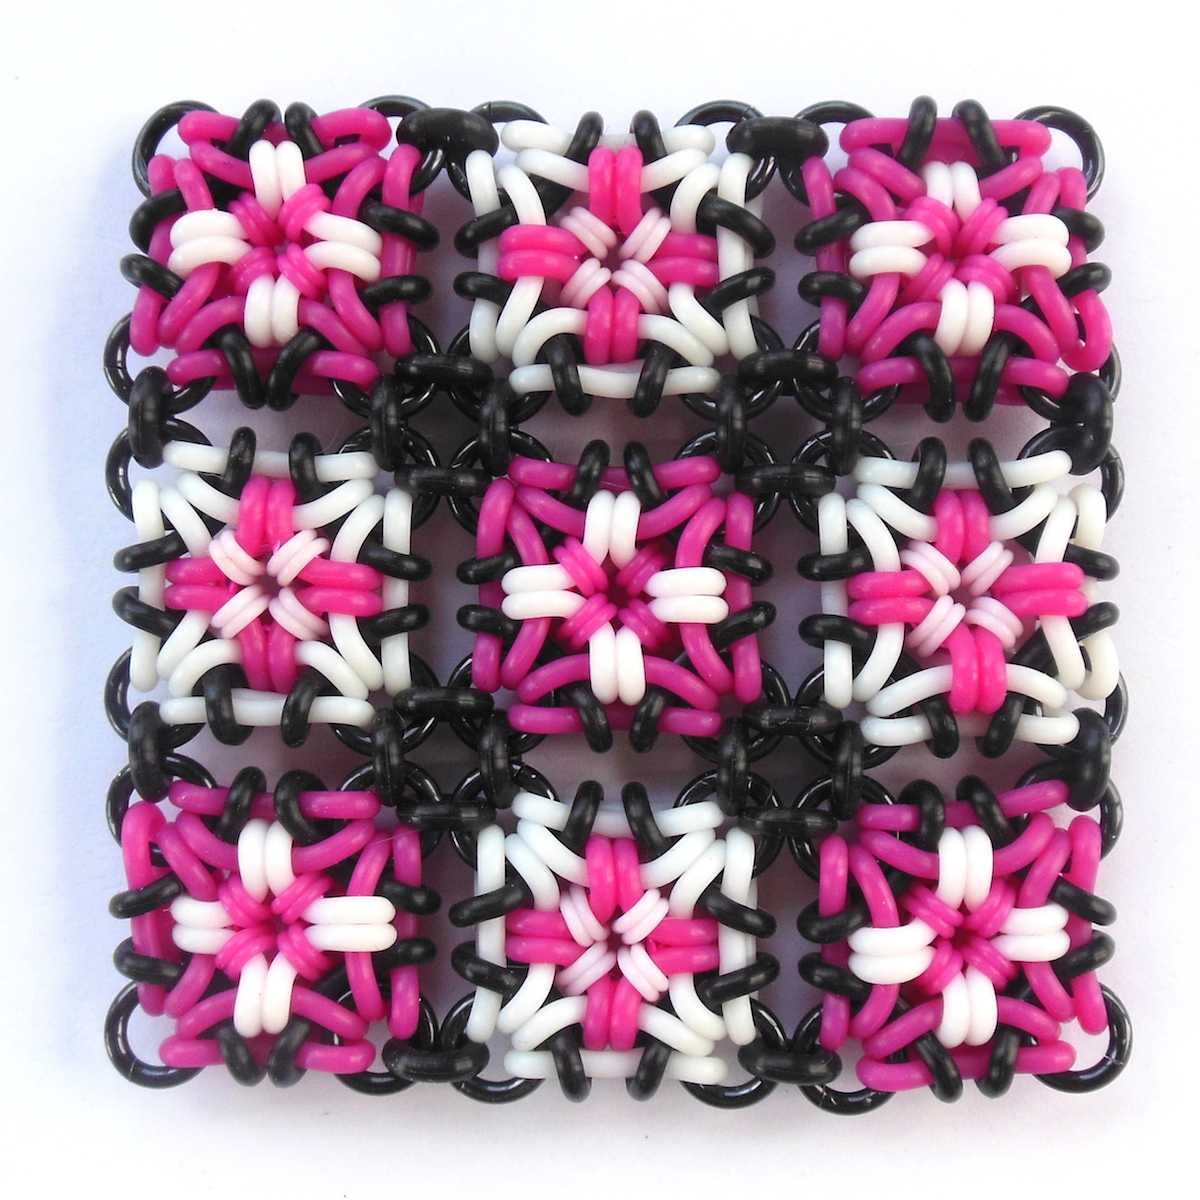 I love how it looks like a crocheted Granny Square!
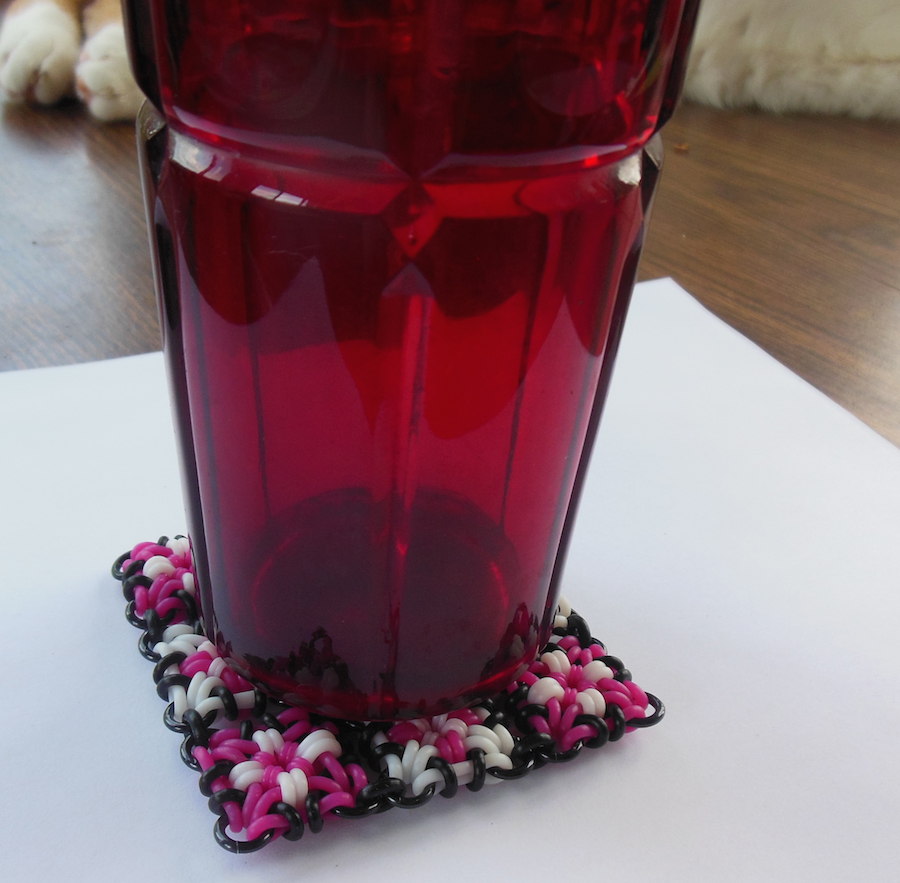 The finished coaster measures 2.75″ across (7.0 cm) which is a bit on the small side (great for tall, thin glasses, but not as practical for large mugs). You may wish to do a 4×4 square instead of a 3×3 square.
Make your own Biomechanical squares and variations! Upload what you make to the Blue Buddha page on Facebook and we might feature you as our photo of the day! Or, upload to Instagram and tag us: @bluebuddhaboutique #chainmaille


 Happy weaving!
Love the coasters! I’m excited to jump in and make these! I think they’ll make fantastic gifts for friends that don’t wear much jewelry. Thanks so much for the free tutorial.
I don’t think you could have found a more gorgeous model for the earrings!