Disclosure: Some of the links to products below are affiliate links, meaning, at no cost to you, I may earn a commission if you click through and make a purchase. It helps me create content like this for you, and I thank you for your support.
UPDATE May 2019: See the second square I made on the Rebeca Mojica Jewelry website.
A Behind-The-Scenes Look At The Planning & Weaving Of My Colorful Contribution To The Chainmaille Quilt Project
 Frequent readers of the B3 blog may already know about the chainmaille quilt – a massive collaboration between maille artisans all over the world. Artists are each contributing a patch, and all the patches will be stitched together to create the world’s largest chainmaille quilt! OK, to be honest, I haven’t verified that it’s the world’s largest … but neither I nor any other artisans involved know of a bigger quilt, so that’s my story and I’m sticking to it! (If you do come across a larger chainmaille quilt, do let me know because obviously I’m going to want to blog about it! 😉)
Planning My Square
When I heard about the quilt, I knew I wanted to contribute. But first, I needed to figure out what to make. The requirements set forth by Jen and Lis are purposely very free and open: essentially, so long as each patch fits into an 8″x8″ square, is strong enough to handle weight and pressure from the rest of the quilt, and doesn’t closely duplicate an already submitted patch, the artist has free reign.is!
For help narrowing down my options, I turned to the Blue Buddha fans on Facebook and asked them what were the first weaves that came to their minds when they thought of me, in terms of patterns that I created. The results indicated one weave in particular:
 That wasn’t surprising to me, since Rondo a la Byzantine has consistently been one the most popular patterns we sell, and it was also featured in my book CHAINED. So, Rondo a la Byzantine it is!
First, I needed to see if the ring sizes I had in mind (Blue Buddha’s H18 and N18) could be used to make a sheet version that was close enough to 8″x8″ without needing all sorts of crazy edging. I did some rough calculations based on a bracelet I had, and it seemed like it would work, but I wanted to render a life-size illustration to be safe. Plus, I knew I’d need to put together a mockup in order to figure out my color pattern, so this was a way to tackle both these projects at once.
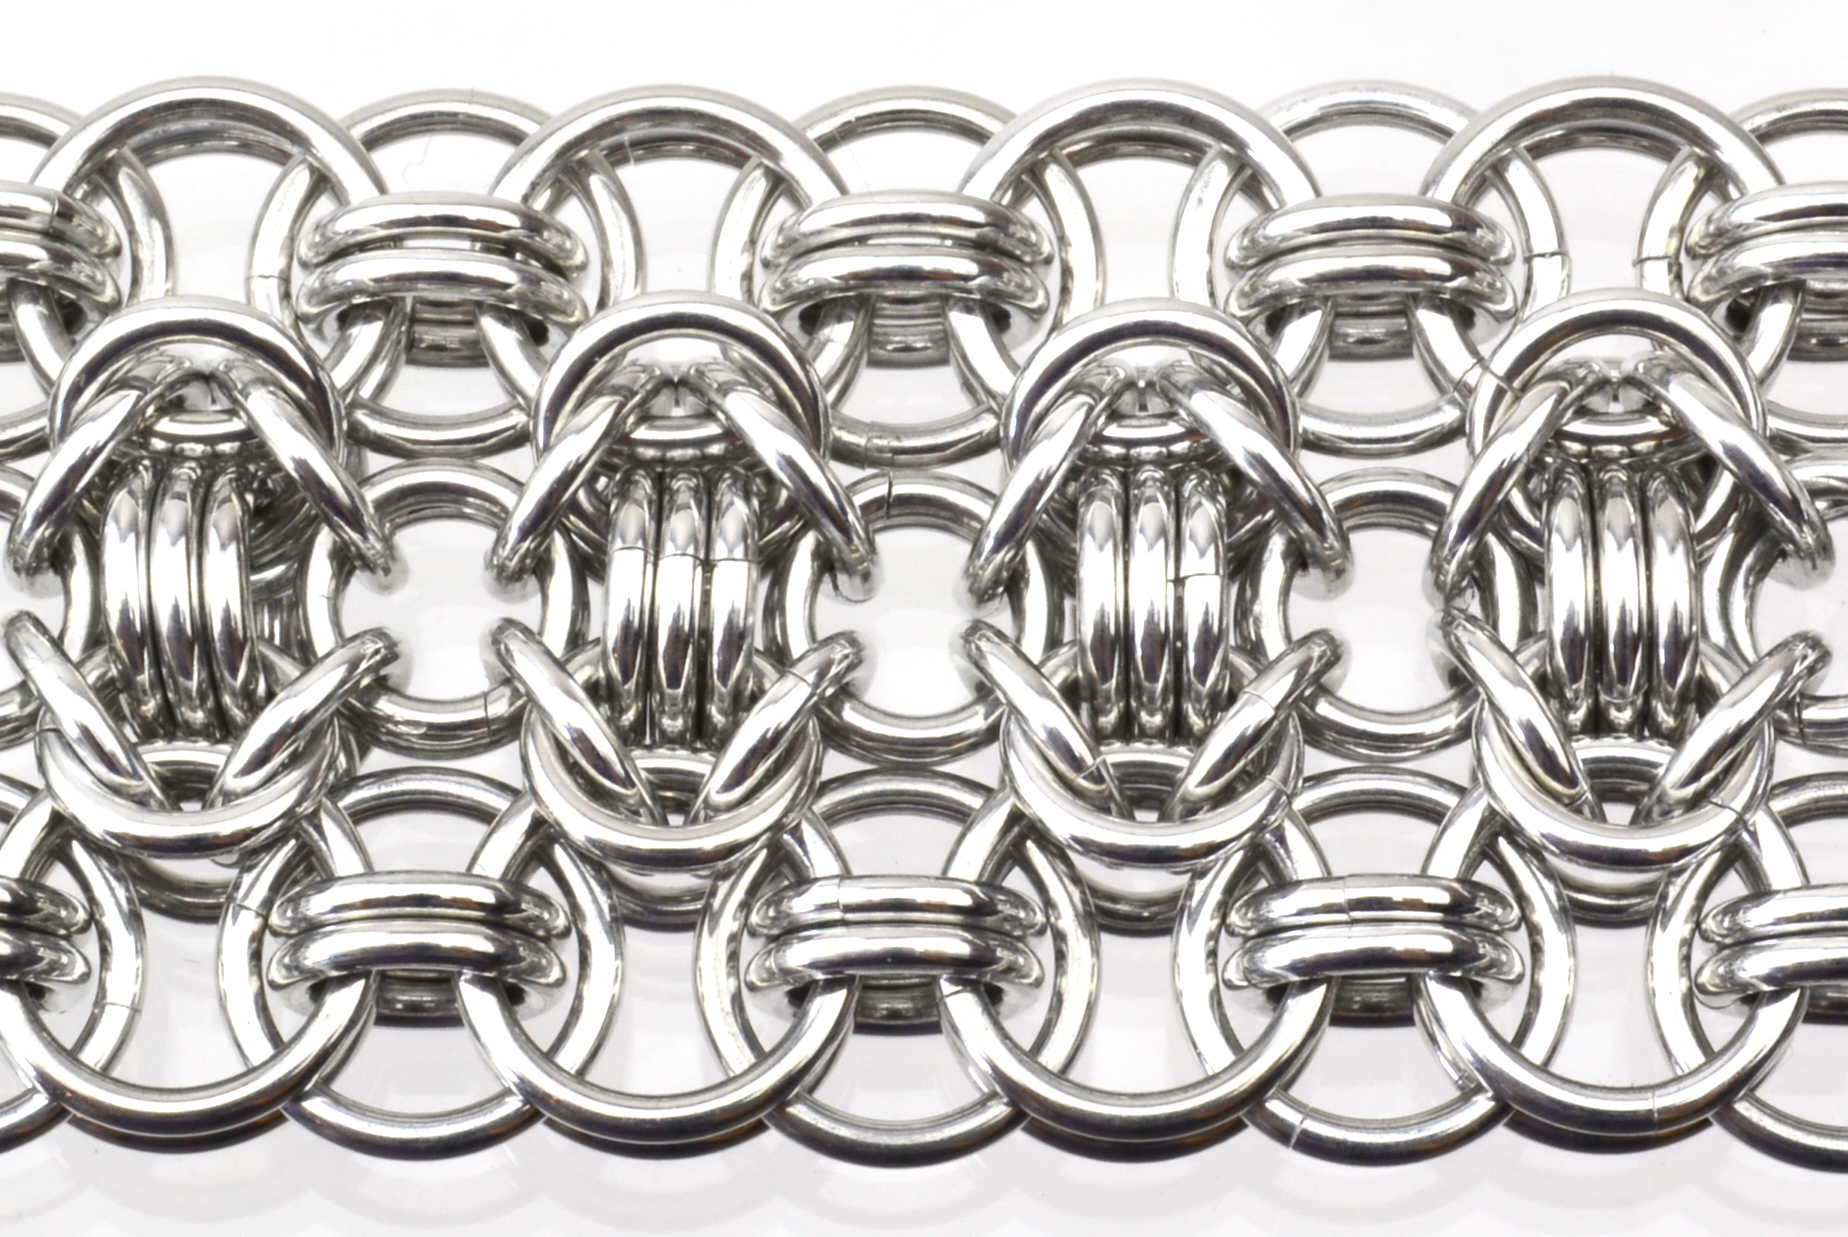
Looking through the old photo files for the original Rondo a la Byzantine tutorial, I found an image that was exactly what I needed: a small, uncolored section of the weave.
 After lots of copying and pasting in Photoshop, I wound up with this image.
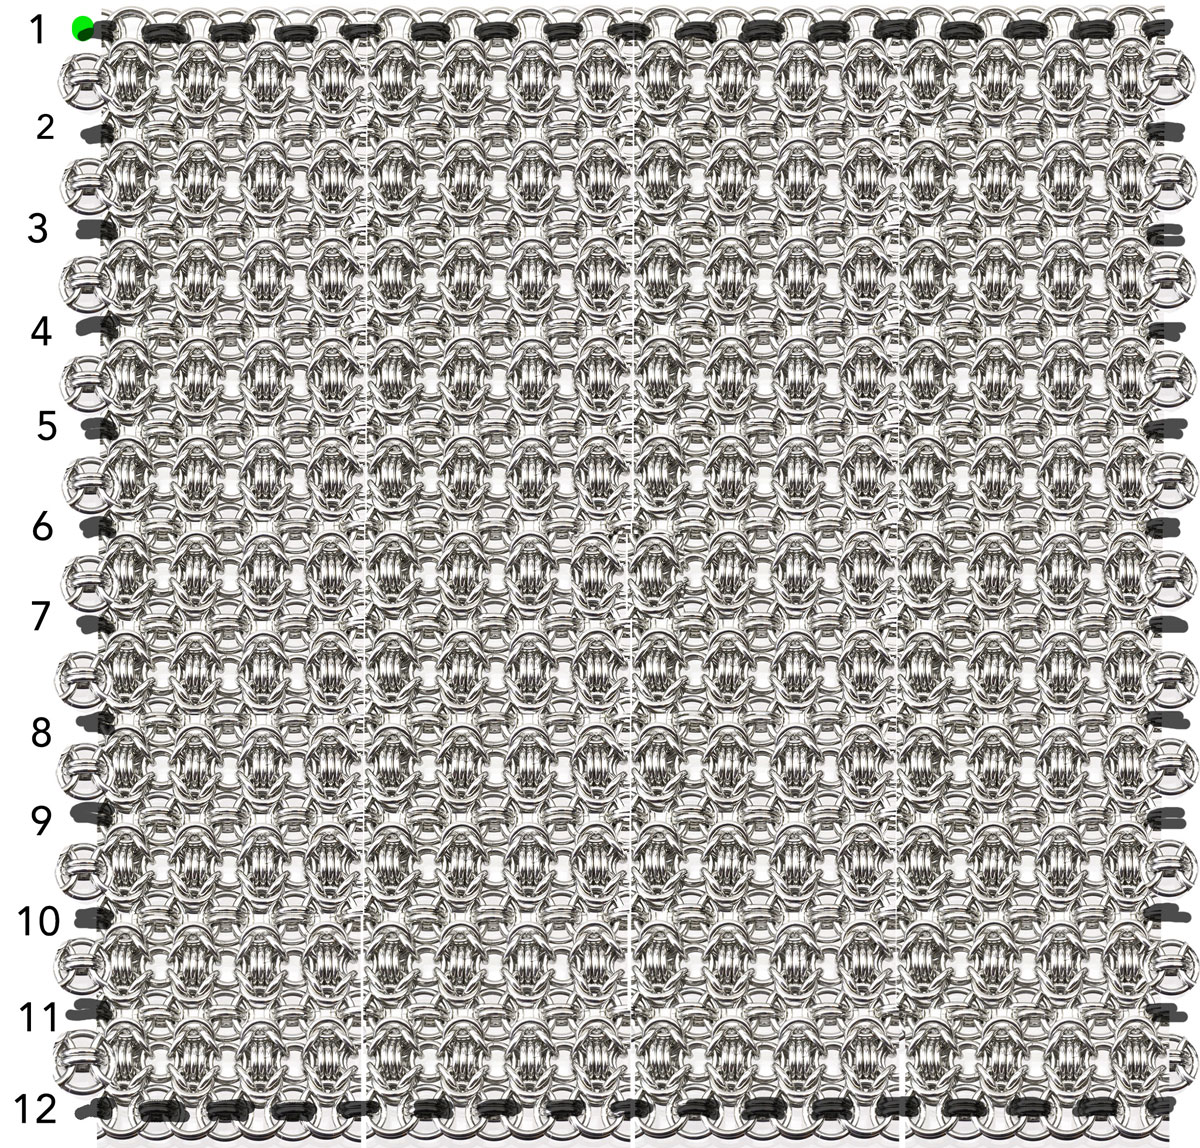 I adjusted the size so that the printout would exactly match the real life version … and much to my astonishment the square measured in at 8″ x 7.9″. Woo-hoo!
Now that I knew the weave would work in theory, I needed to test it using actual rings. This part was important because I had lots of rings from different vendors, and sometimes the different suppliers’ components don’t play nicely together. I was also mixing two gauge systems, which is usually OK, but every now and then things get finicky.
I already had a bracelet sample of Rondo a la Byzantine, so I removed the clasp, extended it to 8″ and then added a second row, using rings from various suppliers in various permutations, just to make sure any combination I might want to use would work.
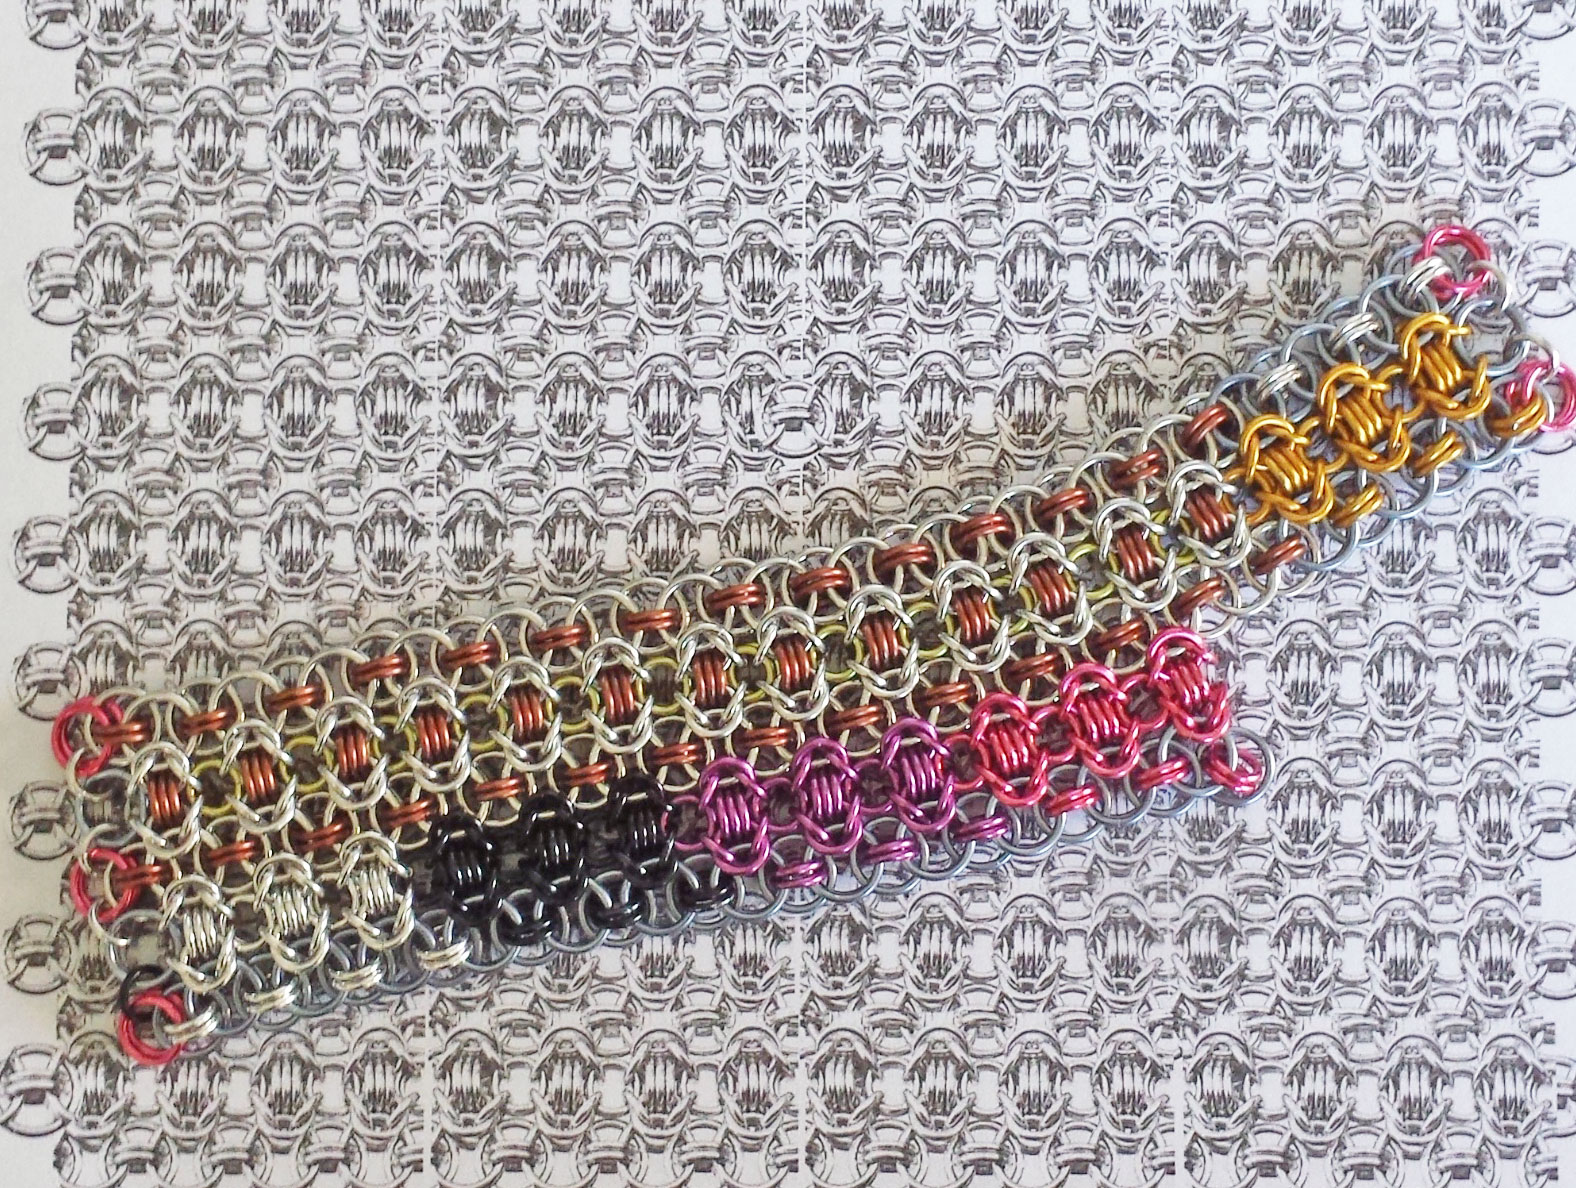 Thankfully, all the rings worked perfectly with each other! (Note – if you want to know ring sizes, scroll down to the bottom of the post for full stats including ring sizes.)
The next step was to figure out my color pattern, so I could order any rings I didn’t already have in my stash. This was definitely time-consuming, but well worth the effort, because I would not have been able to weave such an intricate pattern without any planning. I wanted to use lots of color and also have a vaguely fractal-esque diamond-shape pattern. After pretty much a full day’s work (spread over a few days) in Photoshop, I was satisfied with my design.
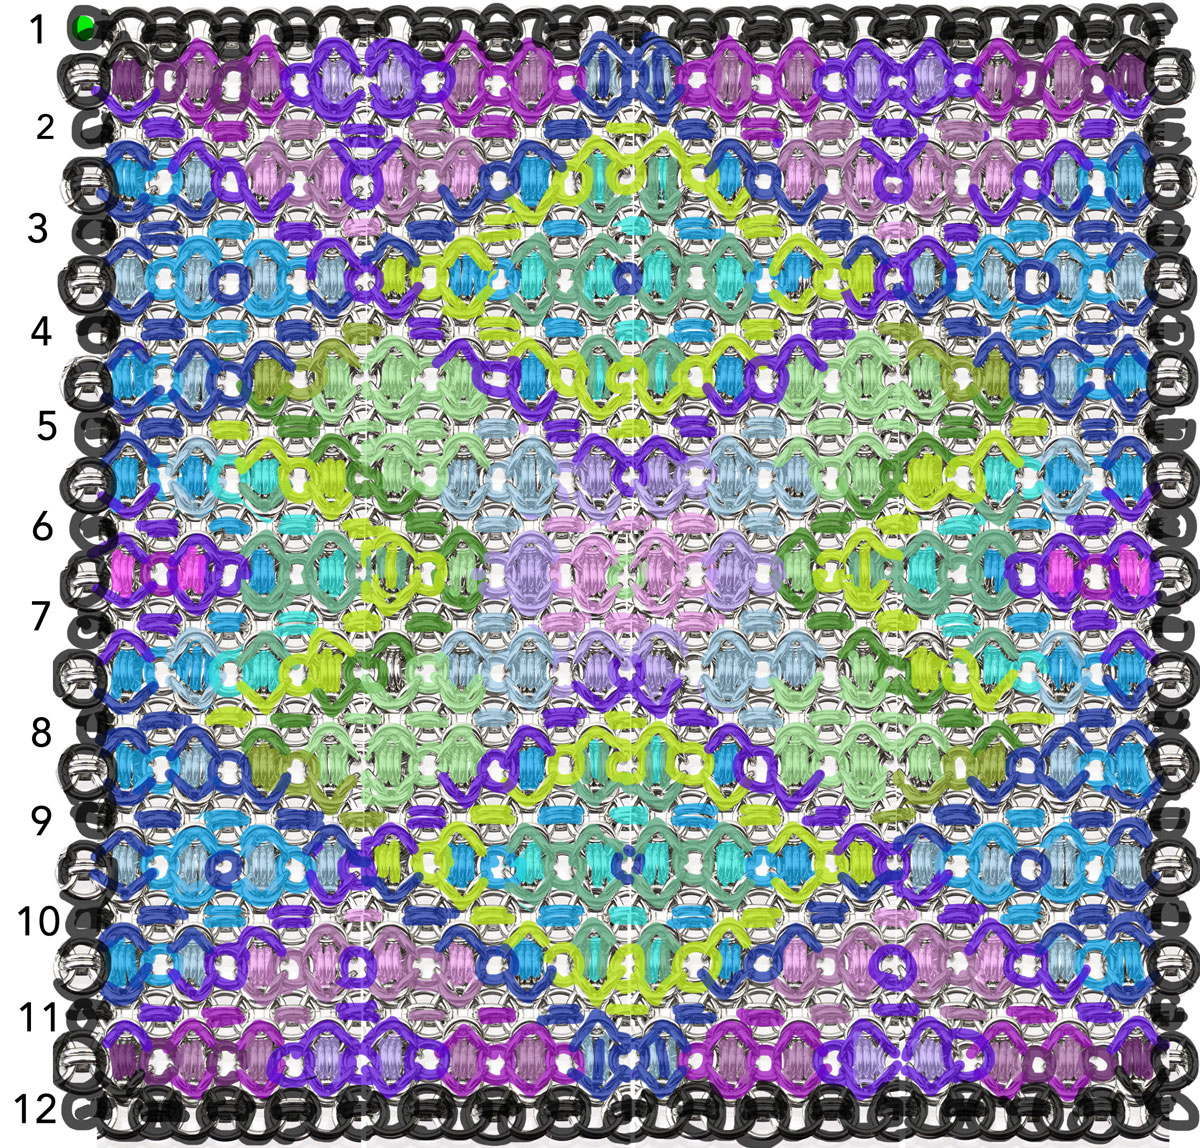 There are two main ring sizes used in this weave. For the large ring size, there are two positions (doubled rings vs singled rings). Each of these is in its own group in Photoshop, allowing me to create printouts of a single ring size. The large-ring printouts in particular were helpful as I wove, because it would’ve been too difficult to try to ascertain each ring’s color in the master printout above, especially for the single large rings which are essentially buried beneath all the other rings and difficult to see in the master printout.
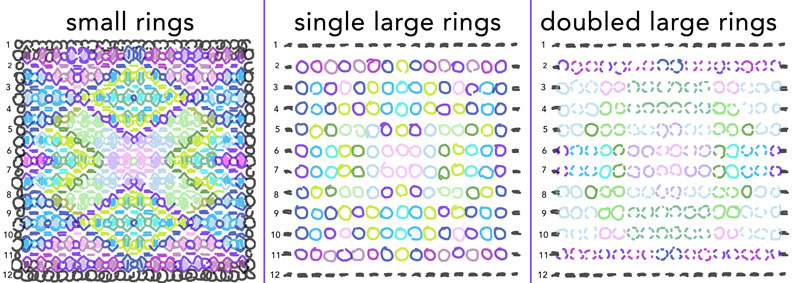 As I designed, I also created separate layers for each color within the size groupings. This allowed me to isolate a single size/color and view those rings by themselves, for instance, dark blue small rings:
 The isolation was helpful when tallying how many rings I needed in each color/size. It also helped me clarify a color if I couldn’t distinguish between closely-related colors on the printout.
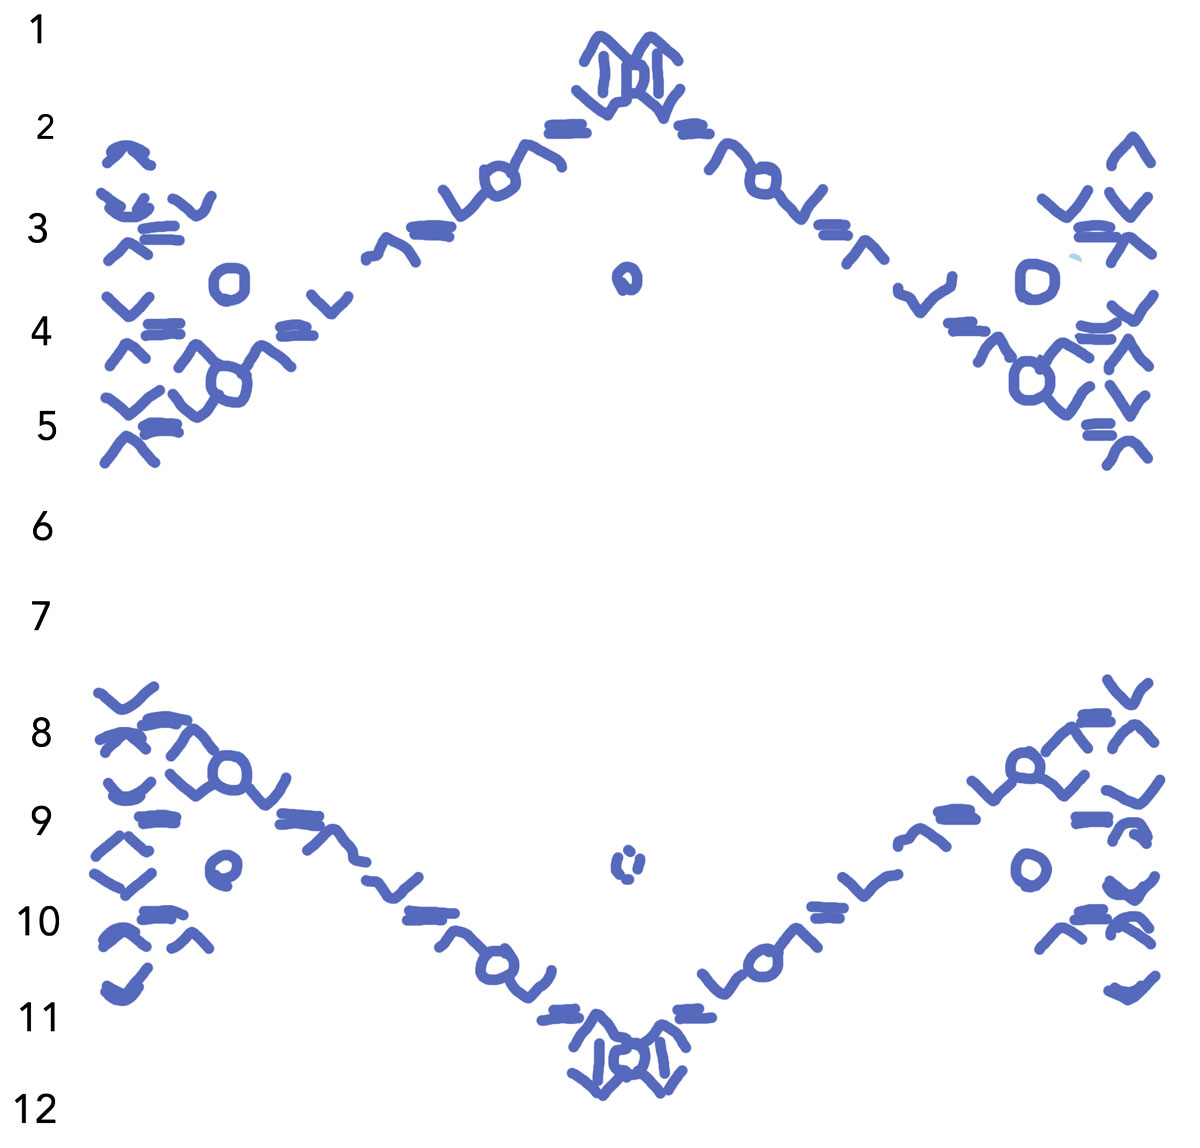
Tangent for designers, math nerds, etc.:
The design has 2 lines of symmetry. When counting rings, I just looked at the upper left quadrant and then multiplied by 4 to get a grand total. (Along the borders, there were sometimes half rings—or, in the very center, a quarter ring—and because I’m a math nerd, I took that into consideration with my calculations. But really, if you’re doing a similar project, it’s not a big deal if you stick to simply multiplying by 4.)
I was already well into the design process before I realized that I could’ve also just colored a design for a single quadrant, and then copied and pasted—flipping horizontally and vertically as needed—in order to create the full patch. It would’ve saved a LOT of time trying to accurately color everything in. I took this approach on my next project (yes, I’m making another one of these squares, just because 😂). It definitely saved time and improved accuracy, though I learned something else: my brain isn’t very good at predicting what the complete design will look like once the quadrant has been mirrored along both axes of symmetry. I wound up periodically pausing to copy and paste the quadrant-in-progress into the full patch in order to see which design elements weren’t satisfying. Then I’d could go in and make tweaks before continuing.
Weaving The Patch
OK. Finally, the design was plotted. Rings were ordered and received. Now was time for the best part: weaving!!! *happy dance*
I’d guesstimated it would take about 20 hours to complete my patch, and I had a week in which to finish in order to make the soft deadline to have the patch on display at the national Chain Link Up gathering in Tennessee in March of 2019.
The first day, I made substantial progress and knew I’d be able to finish in time, unless some unforeseen disaster came up.
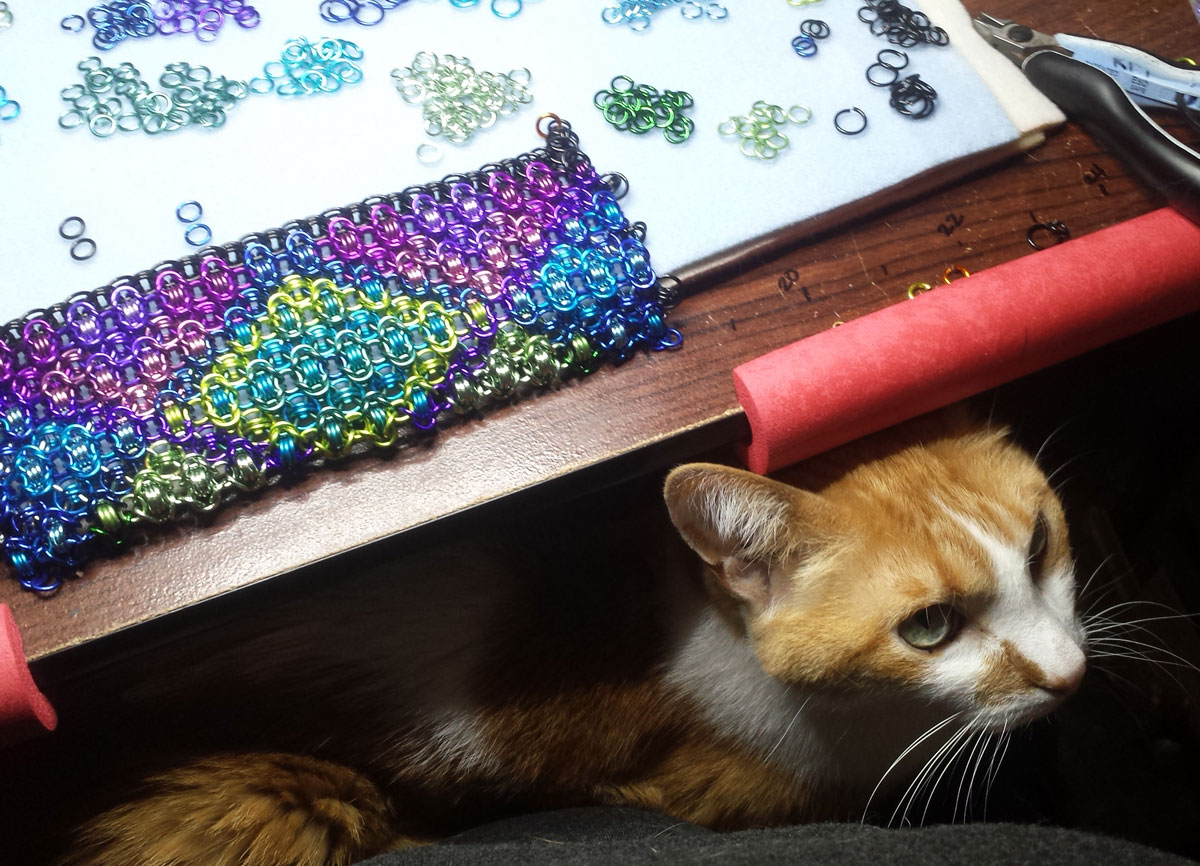
 By day 2, my supervisor had comfortably settled into his spot.
 Here’s an image that shows what the piece looked like about halfway through, laid on top of the master printout. It was at about this point I started adding the finishing rings to the edges (along the bottom and top of the piece as laid out below). This helped create a more flush edge, rather than the jagged lines of the original pattern.
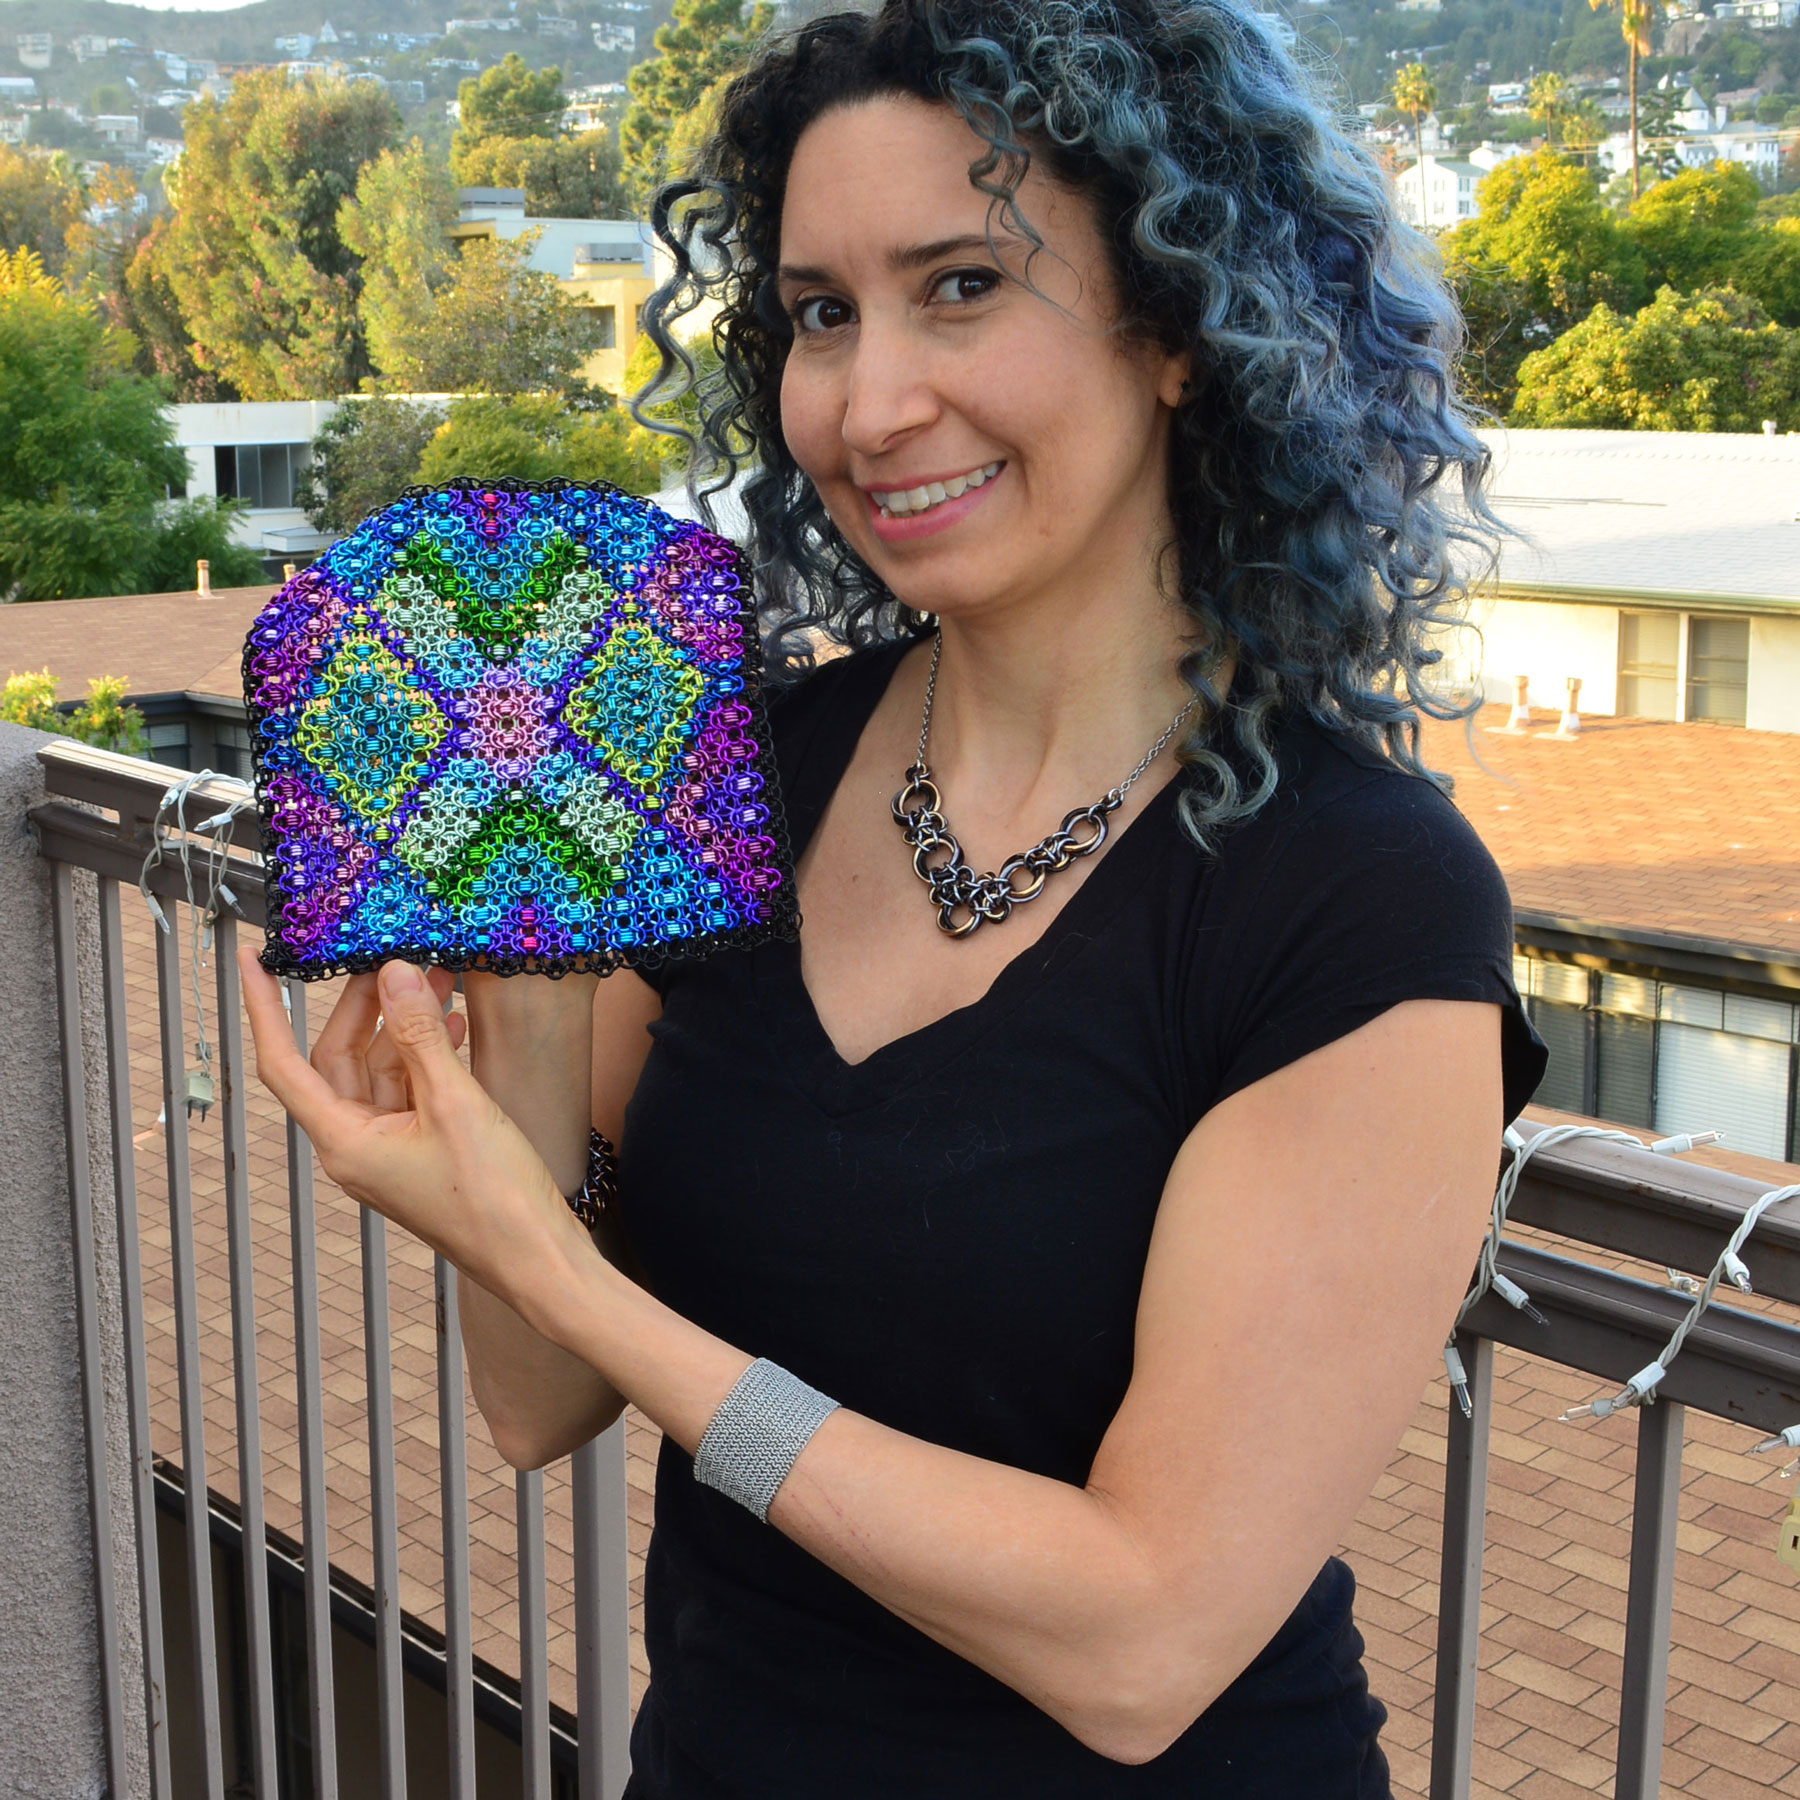
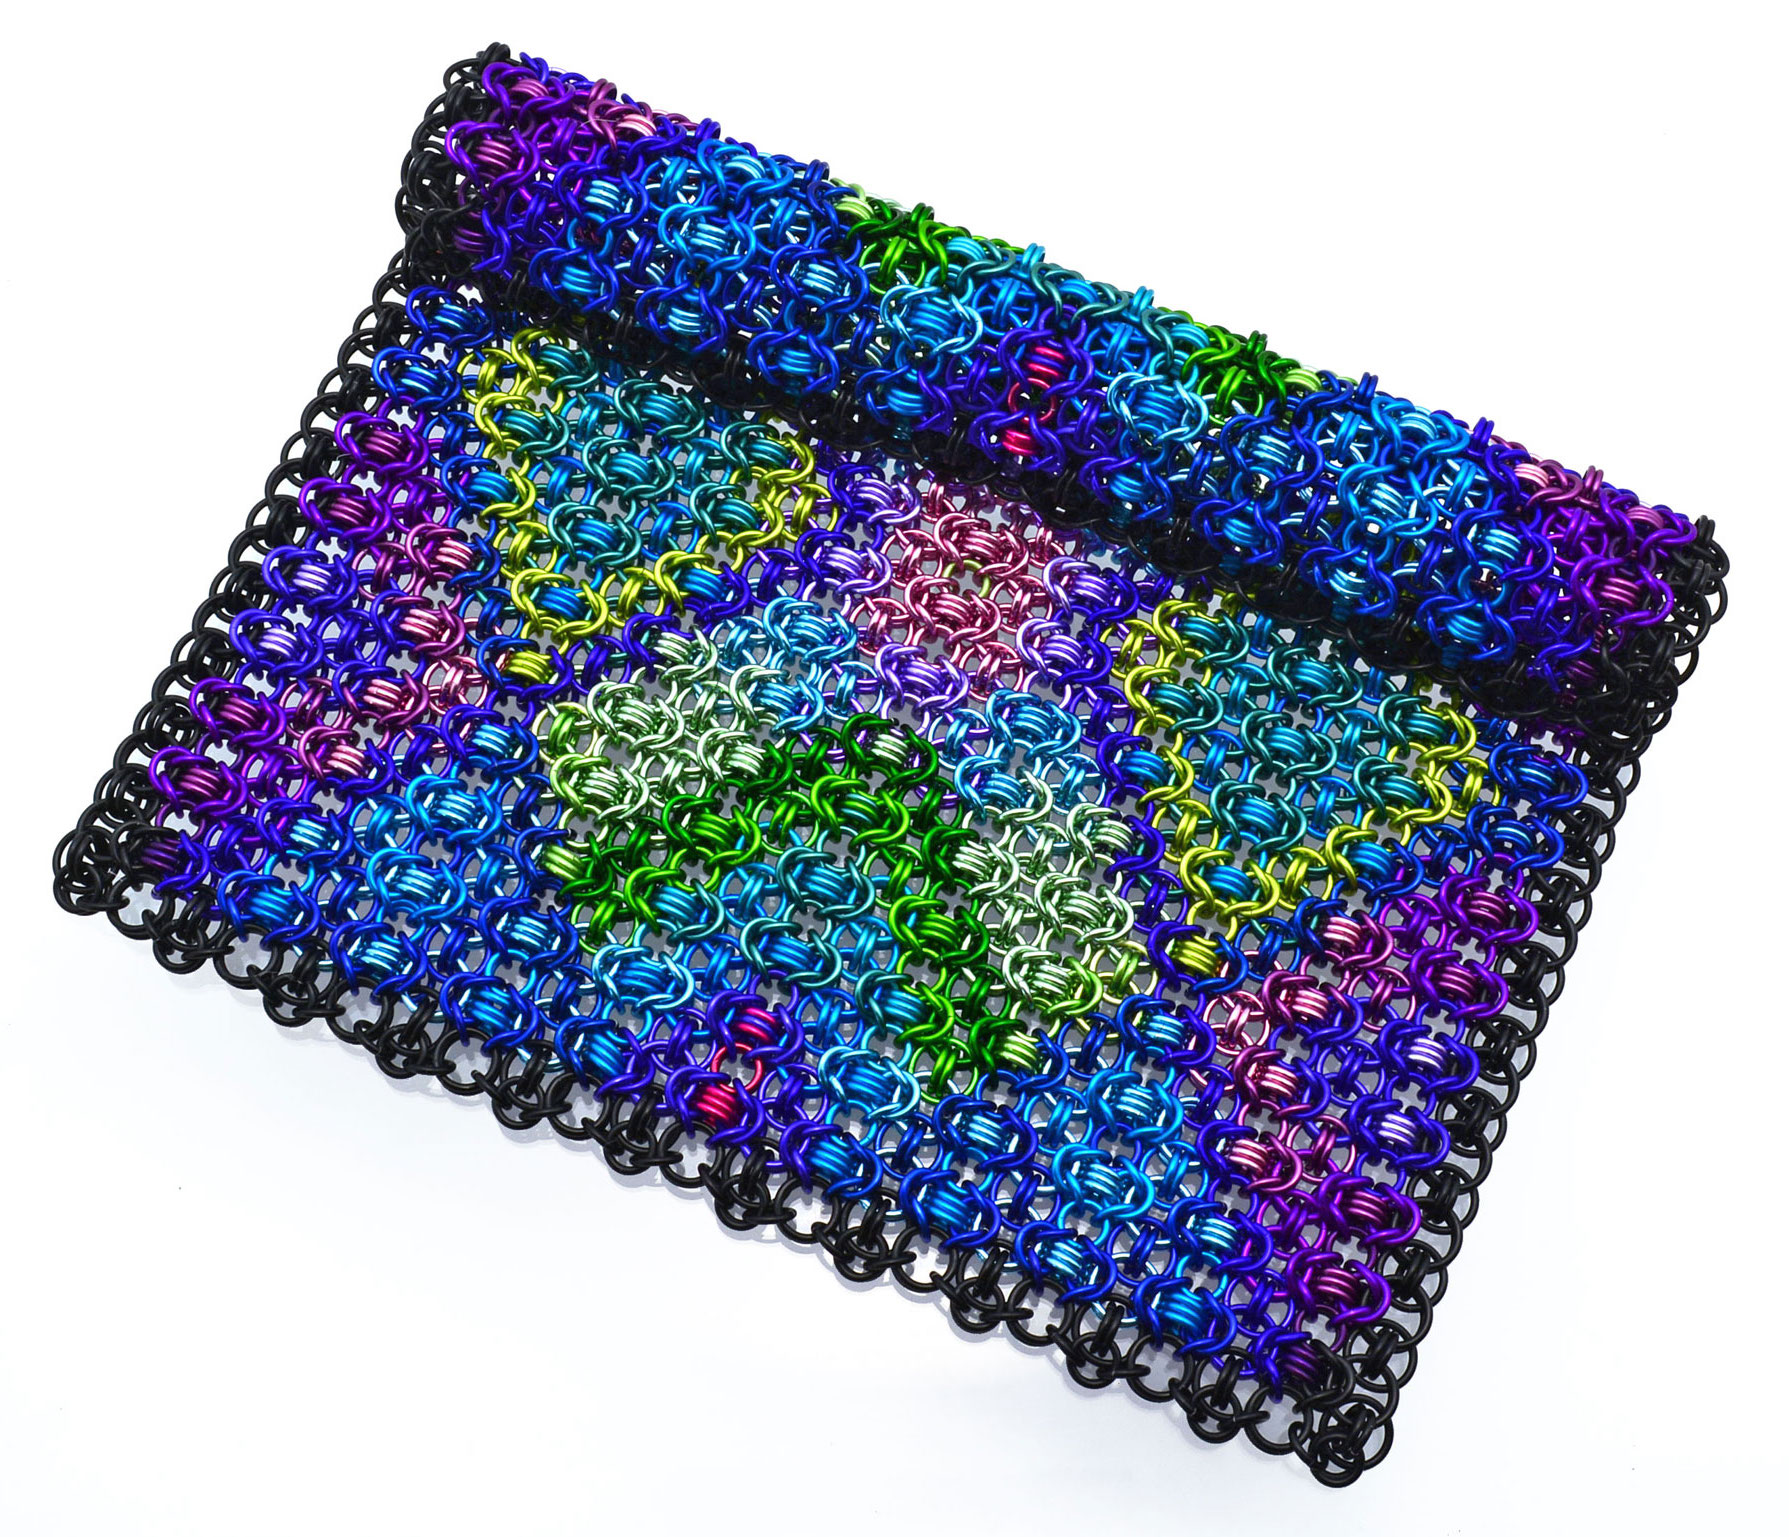
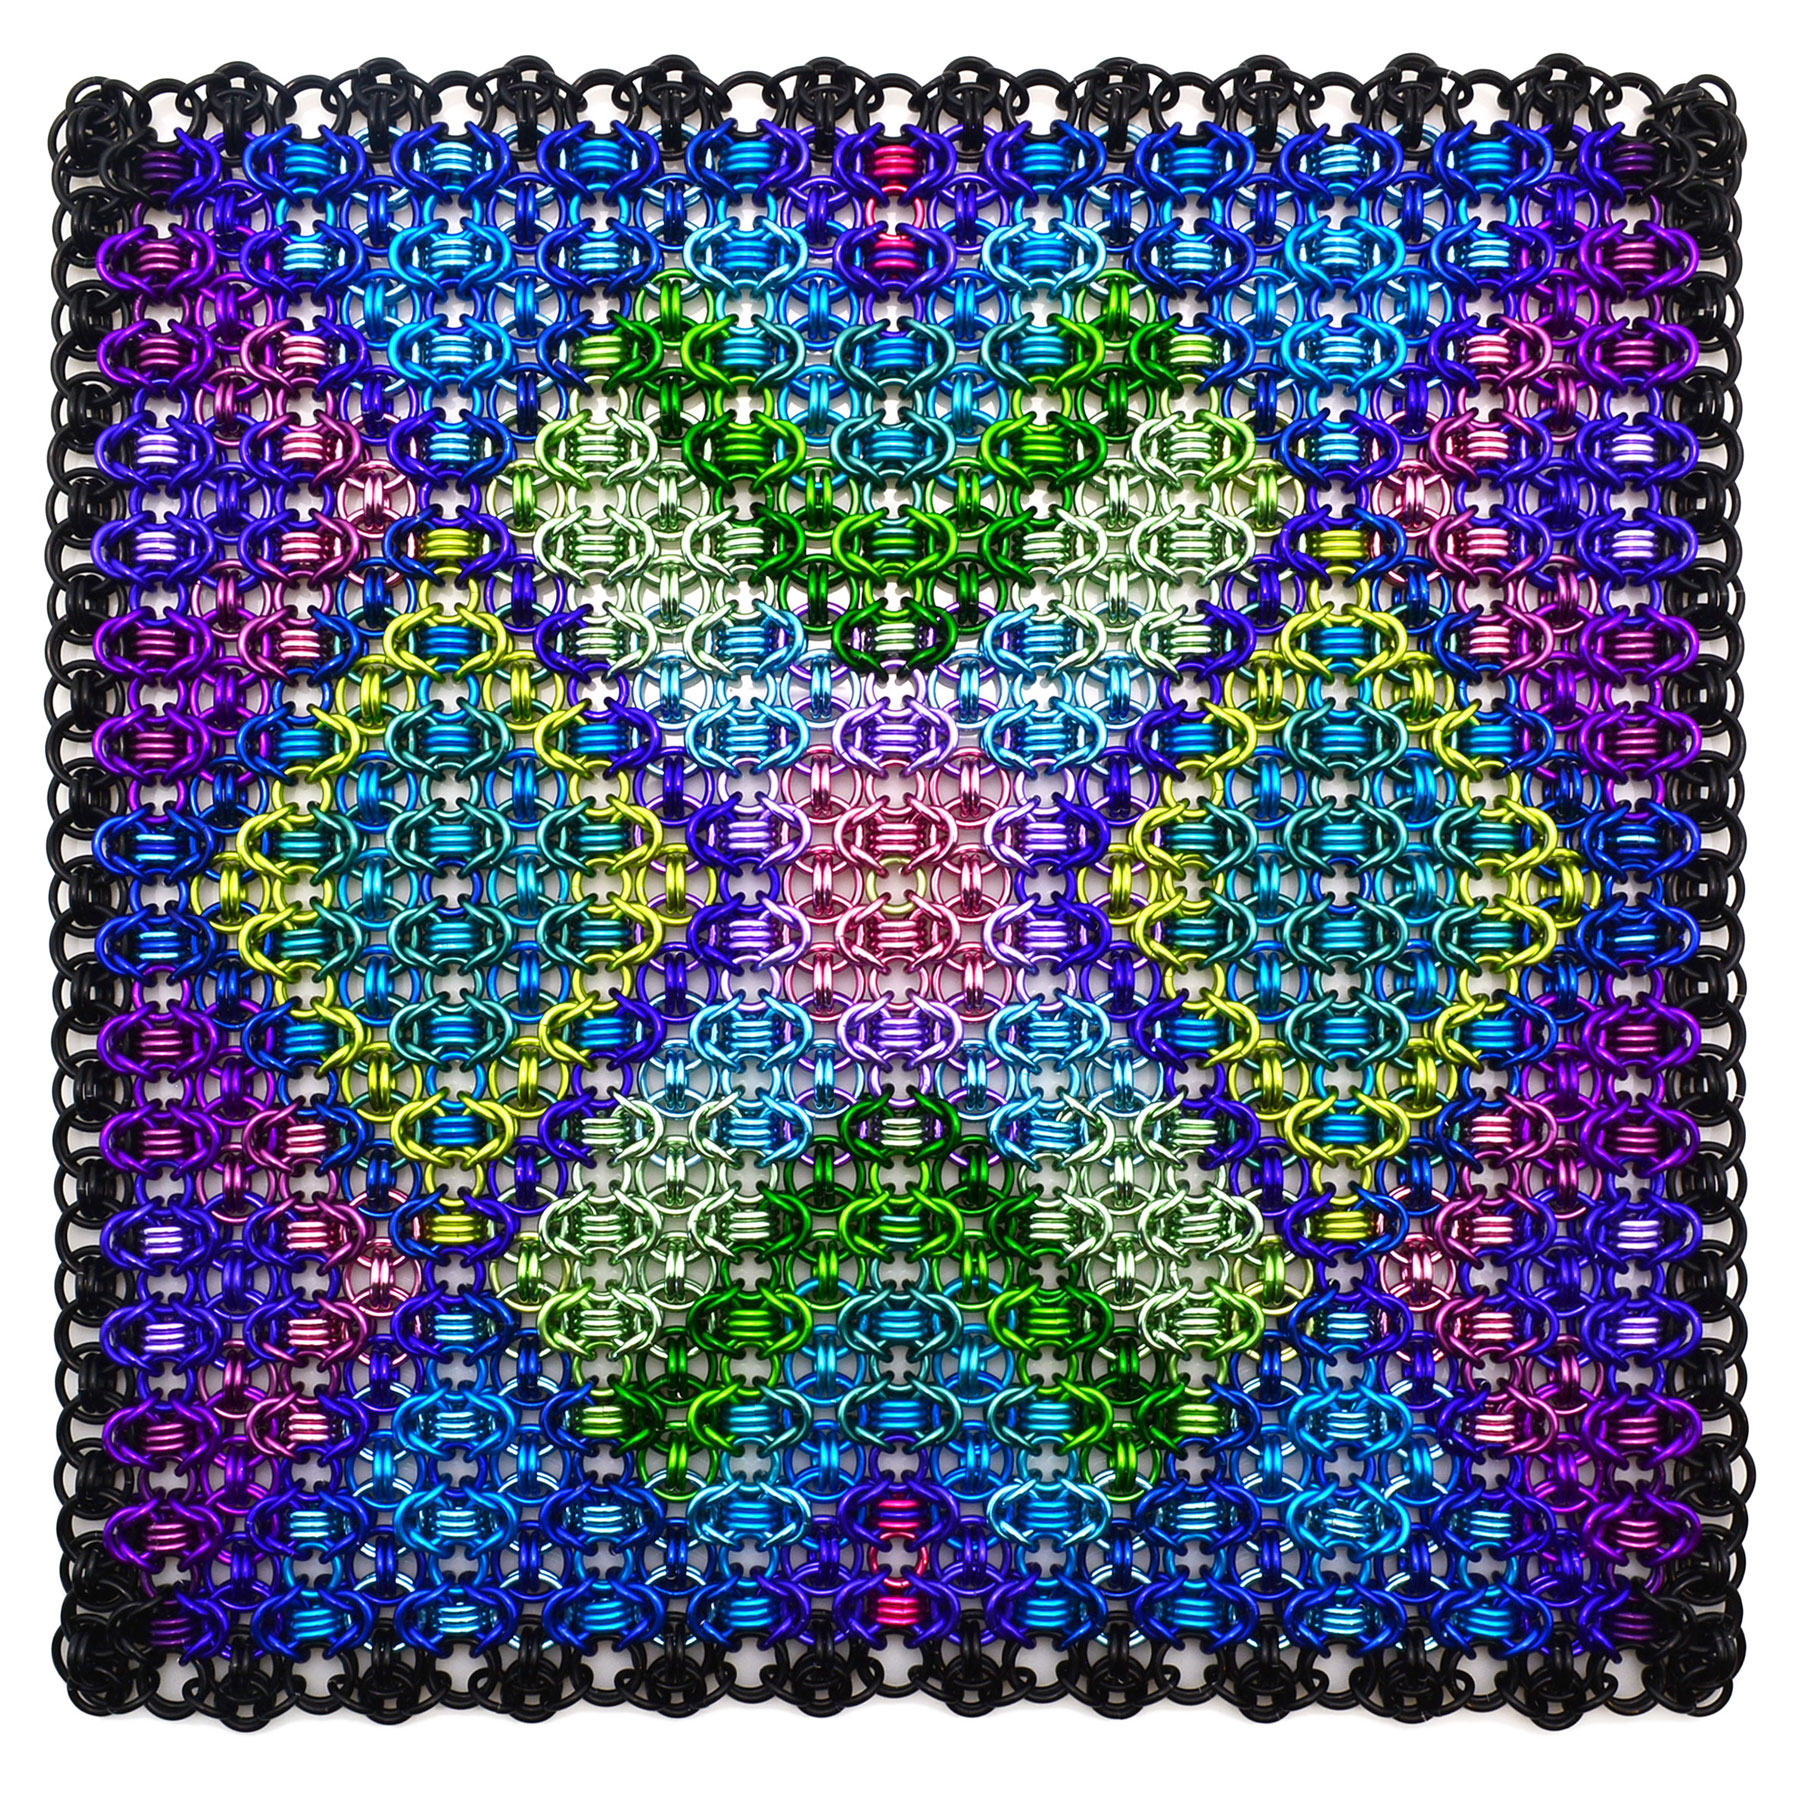
 And so it continued, ring by ring, row by row. At the end of the week, it was finished!
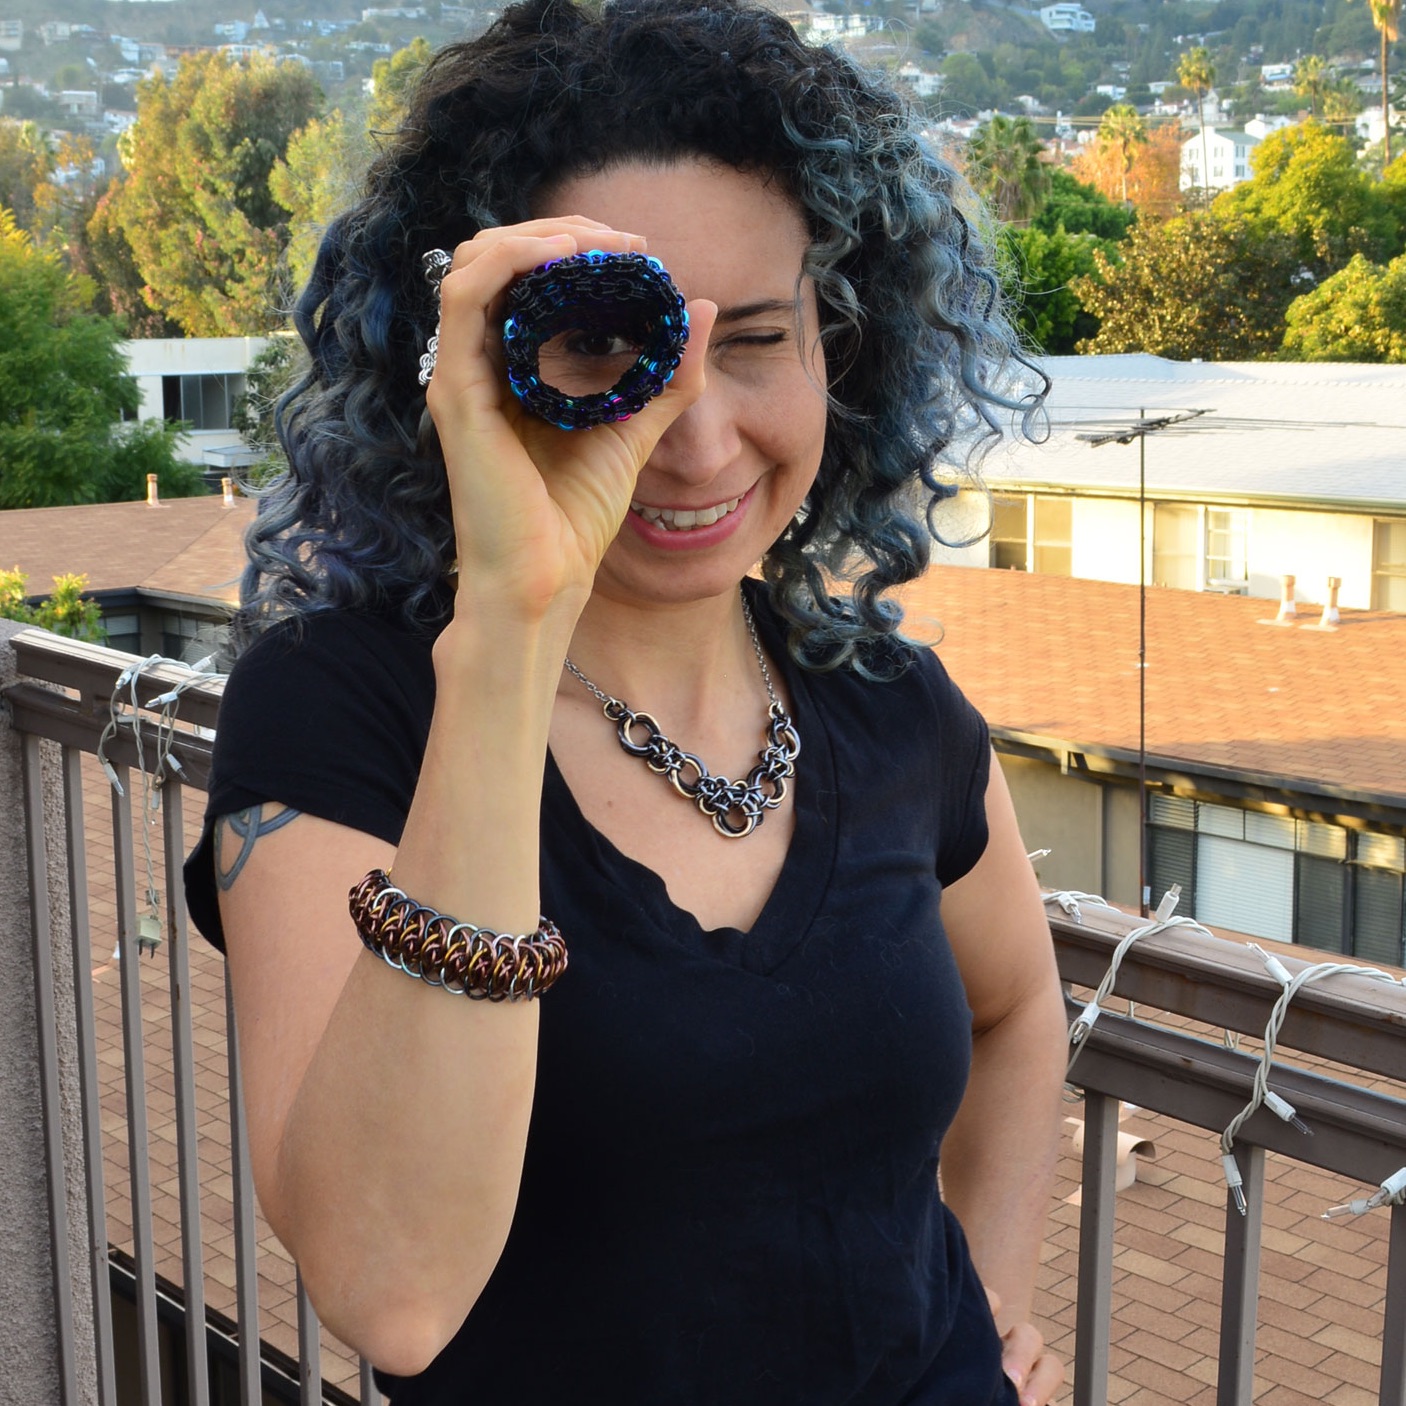
 As you can see, the quilt can be tightly rolled in one direction. This is the direction that needs to be flexible to comfortably wear a Rondo a la Byzantine bracelet.
 Along the other direction, the weave is rather stiff, and cannot be tightly rolled. This is as snug as it gets:
 It Wouldn’t Be An Epic Project Without A Mistake
As I was sorting and editing the photos of the finished piece, much to my chagrin, I noticed an error!
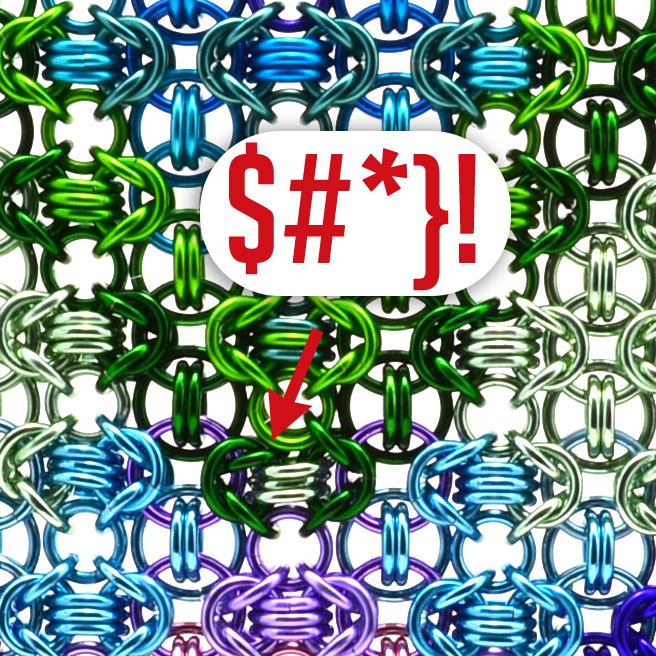 Luckily, out of all the errors I could’ve made, this was a relatively easy one to fix since the ring could be easily removed and re-positioned, especially with my trusty Lindstrom Stubby Nose pliers. (If there was an issue with one of those single large rings, sandwiched between all the other rings, it would’ve been a different story, and a lot more cussing would’ve been involved!)
Truthfully, I made other errors as I wove (usually a wrong ring color, but there was one row where I put three rings in the wrong place, and after the third, I knew it was time to call it a night!) I definitely wove this project much slower than normal, because I had to check each and every ring to make sure it was the correct color. All in all though, I’m quite satisfied with how few mistakes I made and also the overall speed in which I was able to work.
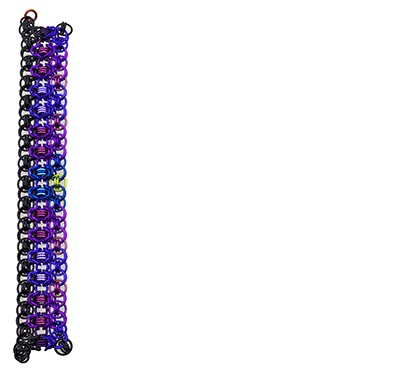
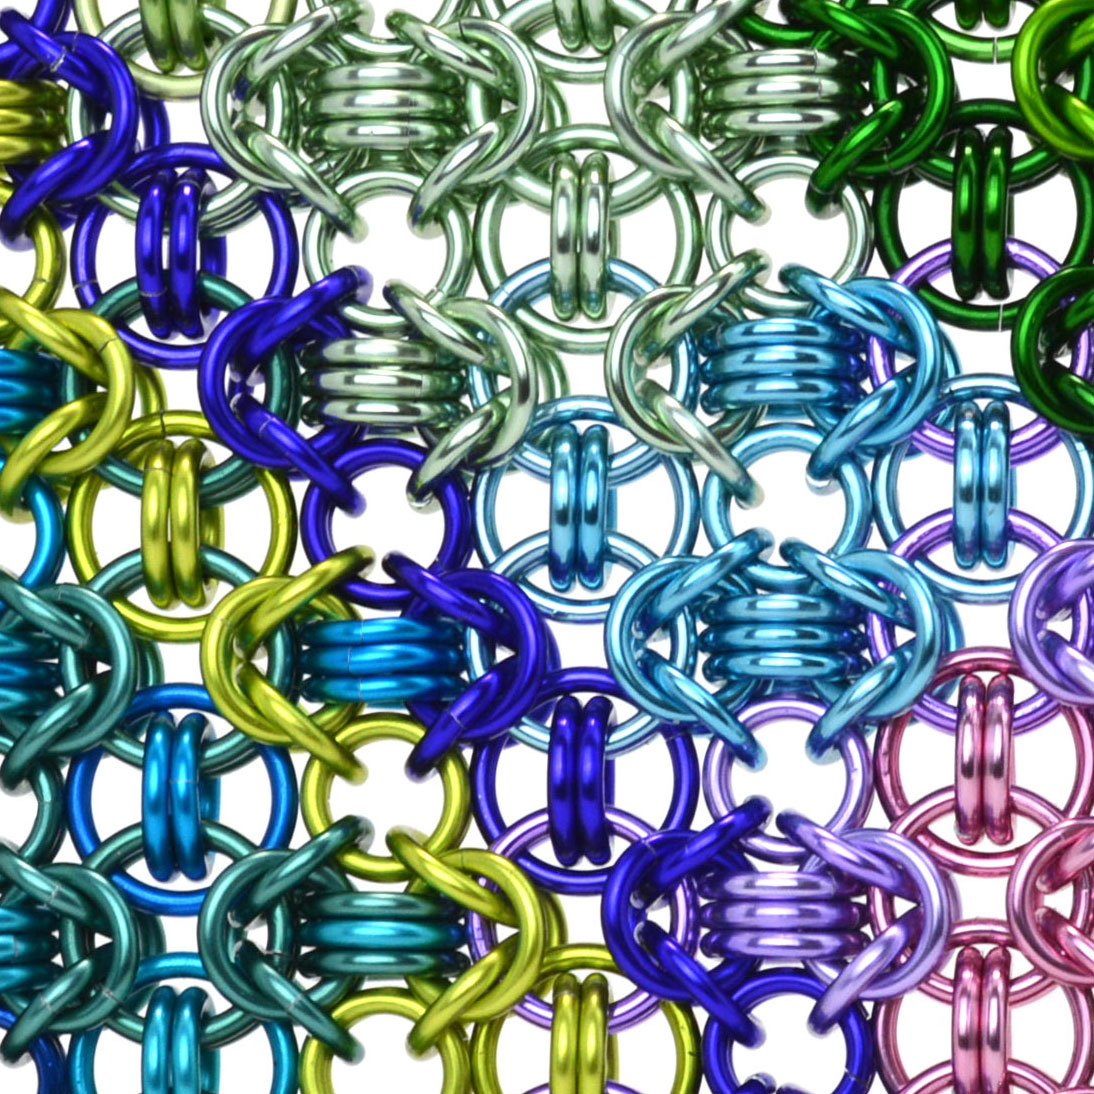
 Looking at the weave close up is extremely satisfying to me. Seriously, this photo makes me smile each and every time.
Stats:
ring count: 3,398
weight: 209.5g / 7.4 oz
weaving time: approx 20 hours (includes un-doing and re-doing errors)
Note: You can purchase jump rings in these sizes in the B3 Etsy shop to make your own Rondo a la Byzantine piece.
 I hope you enjoyed learning about the process behind my Chainmaille Quilt square. Follow my Instagram @rebecamojicajewelry for updates on a new 8×8 square, which I’ll begin weaving later this month. Why a second square? Simply because I had so much fun making the first, and this is what we crazy chainmaillers do. Always. Linking. More. Rings. 😂
If you’re a chainmailler who has contributed to this project, feel free to leave a comment below and let us know about your patch!

Leave a Reply
Be the First to Comment!