
Back in December 2012 I was struck with the urge to create “something big.” Or at least, bigger than the jewelry items I usually make. I also wanted to do something unlike anything I’d done before. After tossing around many ideas, I settled upon the idea of creating a wall hanging with a colorful inlay. I felt like this piece would really challenge myself and force me to figure out tricks to creating curves and other shapes merely by the juxtaposition of different-colored rings.
The resulting piece is my Chainmaille Mandala with more than 27,000 jump rings and measuring 23″ x 23″. The frame is custom-made by Mike of Metallic Reptilian Nailmaille. It was spray-painted a glossy black to match the border of the mandala.
I’m incredibly pleased with how it turned out, and I look forward to gazing upon it for years to come!
Many folks have inquired about the process of making such an inlay, so I’m writing this post to show you what I did, as well as toss out some facts and figures about the piece.
Finding the Inspiration
At first I was struck with the wild idea of creating an Oriental rug out of maille…but I realized that I wouldn’t have time to complete it before Bead Dreams 2013, an international competition I hoped to enter. Also, a rug would’ve been huge. And heavy.  So I decided to create a mandala instead. The size of my piece was determined by the contest size limitations, which had a maximum width of 24 inches. I decided to make the mandala 23″ to allow enough room for a display frame.
 I took to the Internet to try to find a suitable mandala upon which to base my design. I needed to find something that wasn’t too intricate, as my “pixel” size was an F18 ring (18ga Standard Wire Gauge (SWG) with an inner diameter of 5/32″ or approximately 4.0 mm).
After a bit, I stumbled upon a beautiful piece. Unfortunately, the Internet being what it is, it actually took me nearly five times as long to locate the artist behind the piece, as it did to find it in the first place. (Tangential artist rant: Please, give credit where credit is due! Do not post a photo without also crediting the artist behind it, even if that artist is you! )
The piece is by David Chidgey Art Glass Mosiaics. He does some amazing work—do check out his website! I contacted Dave to make sure he was OK with me essentially recreating his piece, and he gave me his blessing. Yay!
Initial Design
Now that I knew what I wanted to do, I needed to create some sort of guide to follow. First, I needed to create a workable graphic as a base. The awesome Marketing Maven at Blue Buddha Boutique, Jenna Deidel, spent a couple hours in Illustrator creating the basic “wheel” shape and outlines. When she was done, I went in and added the black and blue “mosaic” lines as well as the dots of color (turquoise, red, etc) in various sections. When I was all done, the piece looked something like this:
I eventually also added pink and violet “dots” in the purple diamond sections. I also shrunk the grey border just a bit so that the colorful part of the mandala would take up more space.
Now that the design itself was done, I needed to figure out how to translate that to the European 4-in-1 chainmaille weave. Chainmaille does not follow a typical grid layout, so it’s not like I could just overlay graph paper squares on top of my design. I tried futzing with the Irregular Grid Program for a few hours, but wasn’t 100% confident that the resulting pattern would work exactly the way I needed it to. Especially after my buddy Zlosk, the creator of the program, emailed me to say, “Oh crap, it appears that I have “wrong-way” defined differently in IGP than I do in IGP2POV. I need to look into this a bit more closely.” (Note for advanced weavers: Yes, I created this weave in the “wrong way” which means it hangs fully stretched. The “right way” is used for clothing, to allow it to expand and contract around the contours of a human body.)
Zlosk was kind enough to send me a “blank” rendering of an all-silver-color Euro 4-in-1 in the appropriate “dimensions.” To determine the proper number of rings across and down, I’d made a sample patch a few inches wide/long and extrapolated from there.
Starting to Weave
 In Photoshop, I took Zlosk’s blank rendering and increased the contrast to make it less black-heavy when printing (particularly on the black border). I then took the mandala design and created it as a transparent layer directly over the weave rendering.
I printed it out in 9 sections, lined them up, taped them together, and started to weave following the print-out. I had to do a bit of guesswork because most of the “rings” on the paper were partially one color and partially another color. And sometimes even 3 colors intersected onto a single ring. So I needed to tweak to figure out which color the ring really should be in order to keep the pattern as fluid as possible.
My first major stumbling block in this phase, was that after about 10 hours of weaving, I realized the blank pattern was going to be a couple rings too short. Instead of 88 rings across, it was something like 92. D’oh! I was worried that if I stuck to 88 rings, my piece wouldn’t be as square as I wanted it to be.
Rather than completely redo all of this, I just decided to work directly on the paper, as shown below. All of this design prep and futzing took about 14 hours total, not including any weaving. Whew!

Once I really settled into the piece, I essentially divided it in about 5 columns. I would lay the maille on top of the guide, and use my fingers to stretch it, since gravity would be doing this once it was hanging. Then, I’d go across each column and write down the number and order of rings. (When I was finally done with this, I had created more than 30 mini-sheets of paper with these figures!)

I would then go to my color palette and pull the proper rings for a single line in a single column. I’d double check that the lineup was correct before starting to weave. Trust me, if I skipped a ring in the initial count and had to go back and move all the rest of the rings over one spot, that was annoying. (And yes, of course it happened a few times!)

Once that line was done, I’d repeat for the other columns. And then I’d lay the piece back down on the guide, make sure my work looked OK, and then proceed to plot out the next line.
Yes, the work was tedious. And because I had to keep referring back to the color pattern, I couldn’t weave nearly as fast as I normally do. Also, the cats kept attacking the guide; they were probably jealous of all the attention it was getting! It got nice and holey from their claws by the end of this all.
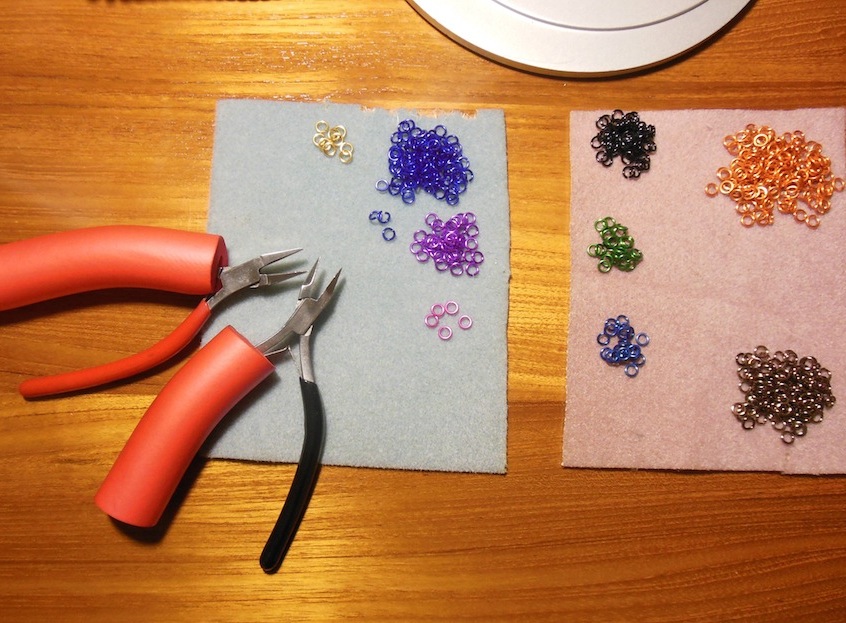
Despite various setbacks and feline distractions, I kept at it for three months. I modified my pliers with a cushy foam grip in order to prevent repetitive stress injury (see below). And I did LOTS of hand and shoulder exercises.
Unlike most of my other weaving, I chose to weave these rings without Tool Magic on the pliers. The weave was snug, and to get in that tight space with Tool Magic was going to be challenging. So I wove it without, which meant that I did have to set aside some rings which I scratched while working. Not to mention the fact that I got a good case of Maillers’ Knuckles (red marks and scabs caused by pliers slipping across the weave and crashing into the knuckles of the opposite hand).

The blood was worth it. I adore the final piece.
I am happy to report that I won the People’s Choice honor at Bead Dreams 2013! Thank you so much to everyone who voted for the mandala!

Misc Facts & Figures
- Total hours – 212 (about 198 weaving hours; the rest = design)
- Started working on it on December 25, 2012; completed it 90 days later
- In this 90-day period, there were only 8 days when I didn’t work on the piece. I was out of town/attending conferences/retreats/unconferences for 5 of those days; 2 days I was just busy with other stuff and couldn’t get to it and on one day I gave myself and my wrists a nice rest.
- Longest stretch of days without a “day off” from weaving: 39
- Highest number of hours woven in one day – 8 hours
- Shortest weaving session – 30 minutes
- Average hours worked per week – 14.5
- Entertainment consumed during weaving:
- Entire (re-imagined) Battlestar Galactica series, including webisodes, The Plan, Blood & Chrome and Caprica
- 3 seasons of Warehouse 13
- 10 episodes of This American Life
- 3 seasons of Arrested Development
- 4 seasons of White Collar
If you liked this post & the mandala, please “like” Rebeca Mojica jewelry on Facebook!


I would like to purchase this picture of your mandala. Is this a possibility?