 We’ve noticed a huge trend in geometric jewelry for this fall. Triangles, chevrons, diamonds – you name it, jewelry is getting angular this season! A craft that primarily uses circular jump rings to come together may not be the first thing that comes to mind for creating sharp lines and corners, but chainmaille can go total geometric if you want it to. For this post, we decided to explore what you could create with a simple technique of creating triangular shapes with Europen 4-in-1 (mesh). The more we played, the more ideas we came up with and what you see in this post is just the beginning. We can’t wait to see what these ideas stir in your own creative mind!
The Weave
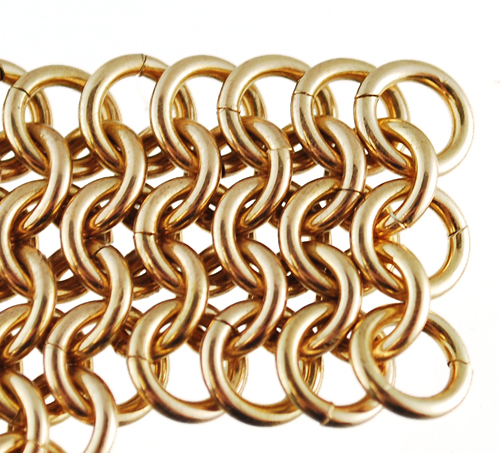
European 4-in-1 a basic weave that anyone can master (check out our Mesh & Rosettes or Mobiused Rosettes tutorials to learn this weave if you’re new to it.) For these shapes, we use our size F18 rings (also available in colorful anodized aluminum) to minimize the negative space in the weave and help the triangles keep their shape. More advanced chainmaillers can play with different rings sizes with a similar aspect ratio to scale these shapes up or down.
Typically when creating European 4-in-1, the weave is created in even rows. If you look at it however, you can notice how the rows are actually offset from one another (the rings from one row sit sortof “in-between” the rings from the rows above and below it.) This is most easily seen when looking at the edge of the weave. See how the end rings in rows 2 and 4 sit farther in than the end rings on the 1st, 3rd and 5th row? This aspect of the weave makes it perfect for create diagonal angles!
The Technique
You can choose to weave the triangles from either end (the widest side or the end point.) It’s really just a matter of personal preference and how you like to work.
 When starting the triangle from the widest side, the trick is to scoop 3 rings when you begin instead of the usual two. When you reach the width you want, scoop just one ring onto the final ring you weave. Flip this final ring to join the row that will become the widest edge of your triangle. You should end up with a 3-row strip that decreases by 1 ring for each row. From this point forward, you can add rows one at a time if you like, making sure each row decreases by 1 ring every time (this happens naturally if you make sure to weave through two rings from the previous row every time.) You can also add two rows at a time as demonstrated in our Mesh & Rosettes tutorial. Just make sure to scoop 1 ring on the first ring you’re weaving into the row,
 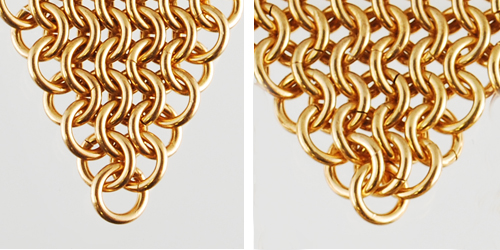 but do not scoop one onto the final ring in order to decrease the row. When you get to end, you can decide if you want to make the point connect to the two ring or the three ring row.
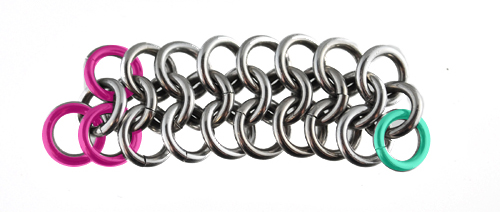
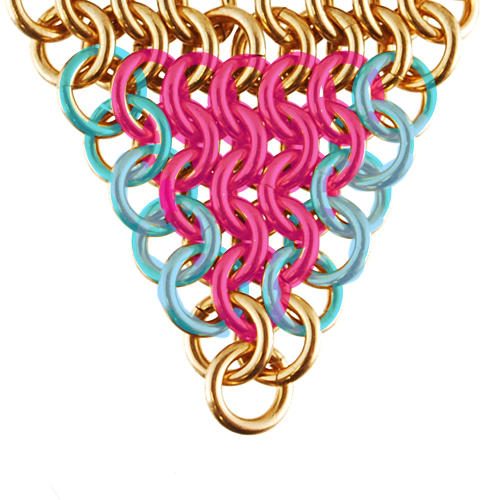 If you prefer to start from the pointed end of the triangle, scoop two closed rings onto one ring to begin. Creating the triangle in this direction is basically a matter of creating the weave as normal in the center of the row (shown in pink), and then adding hanging rings (shown in blue) to the ends of the row. In this case, you will build the triangle one row at a time which may be simpler for beginners to visualize. It also allows you to see how wide your triangle is getting and stop when you like the size.
![]() We also used this “building from the point” technique to create a chevron. Once we got to our 8-ring wide row, we started skipping the very center connection to start creating a v-shape. To continue in a V, you’ll need to continue adding hanging rings (shown in blue) to the outer-most rings in the weave, and then connecting only the next 3 (labeled in pink).
We also used this “building from the point” technique to create a chevron. Once we got to our 8-ring wide row, we started skipping the very center connection to start creating a v-shape. To continue in a V, you’ll need to continue adding hanging rings (shown in blue) to the outer-most rings in the weave, and then connecting only the next 3 (labeled in pink).
The Possibilities
As with most chainmaille weaves, the possibilites are pretty much endless. Once you grasp this technique, you can make all kinds of designs! Here are just a few that we came up with.
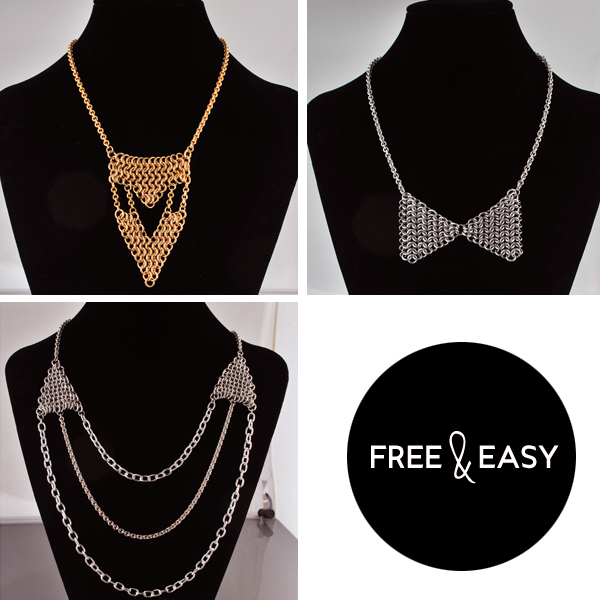
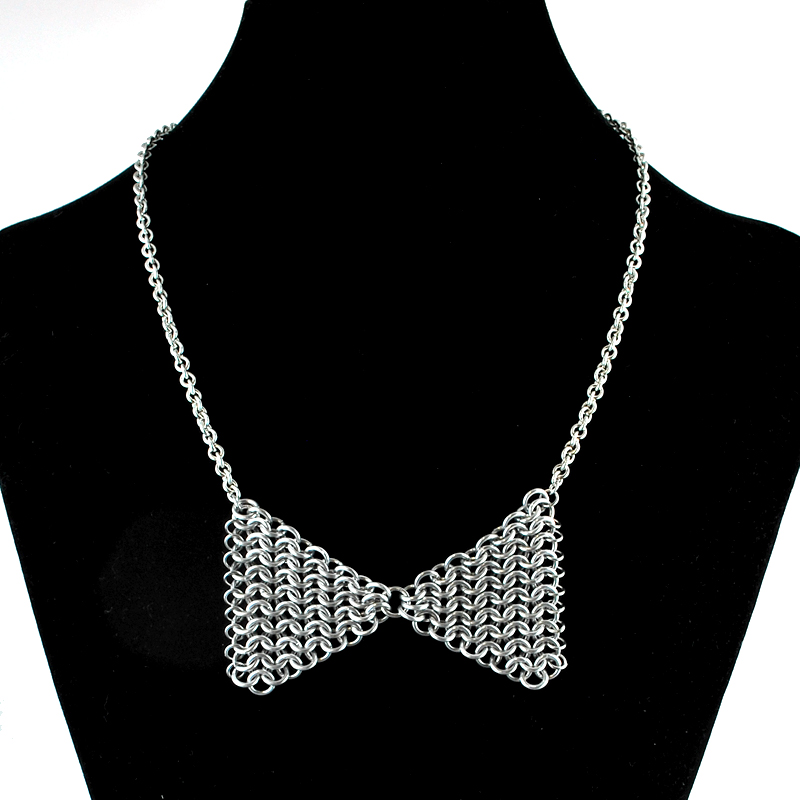 Bowtie necklace: Connecting two triangle at their points creates a simple and fun bowtie. For our bow, we connect the center ring though the 3-ring row on both triangles. We had to use a slightly large ring (size H18) to fit all six rings and still be able to close the ring. On the edges, we added a row of tiny rings (size D20) to prevent sagging and slipping on the sides. We also removed the final ring on each bottom corner because we felt it laid better that way.
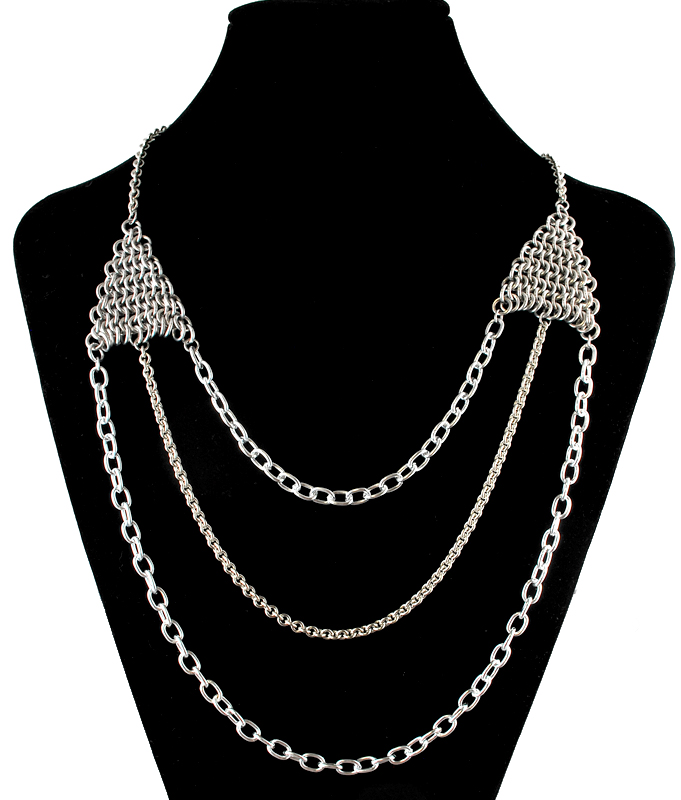
Draped Chain necklace: This project is pretty self-explanatory. The trick here is to keep laying the piece out to make sure the center chains are laying the way you like. Also, we connected the center chain through two rings instead of just one to keep the rings from sagging and pulling out of line with the others.
![]()
Chevron Bib necklace: This piece used the chevron technique we described above as well as a secondary section above that we created by making a 5-row section of mesh and then added a tapered point to the center of the bottom row. Creating this point is really the same as creating the triangle from the widest side that we described above. Make sure to lay your two sections together to see if you like how they are lining up. You can always add or subtract rings to make them align the way you like.

DIY Fashion: Geometric Jewelry · Blue Buddha Boutique http://t.co/jaPu0WBXix